Sandbox
1. Overview of the sandbox environment
1.1 Get the invitation code
Scan the following QR code, add "WeDataSphere open source community assistant", and provide relevant information to obtain the invitation code according to the prompts of the assistant.

1.2 Register and login to use
After getting the invitation code through 1.1, you can register and use it.
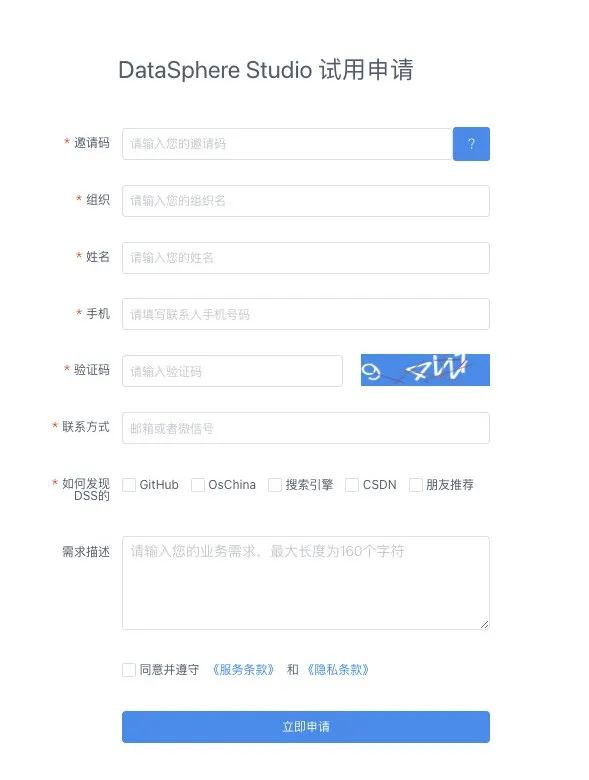
Step 1: Open the registration page link https://dss-open.wedatasphere.com/#/register, fill in the relevant information, and successfully register
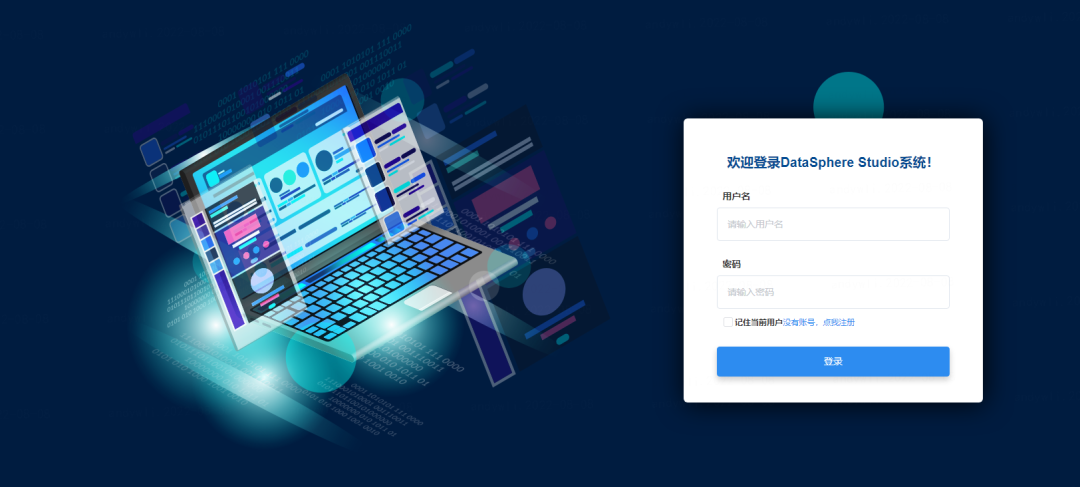
Step 2: Open the DSS sandbox page https://dss-open.wedatasphere.com/#/login, login with the registered account and password;
- Login account: registered mobile phone number;
- Login password: the last six digits of the mobile phone number;
1.3 Interface Description
Important note: For security reasons, the sandbox environment does not support 'add/modify' operations, only support the function of query/view.
(1) After successful login, you will be redirected to the home page of DSS. The top of the home page includes the Admin and Scriptis entries by default, but you can also add other component entries to the top navigation bar. On the home page, switch the workspace and select the project in the workspace. Now AIIDEMO has been configured for everyone to experience, just click the corresponding project.

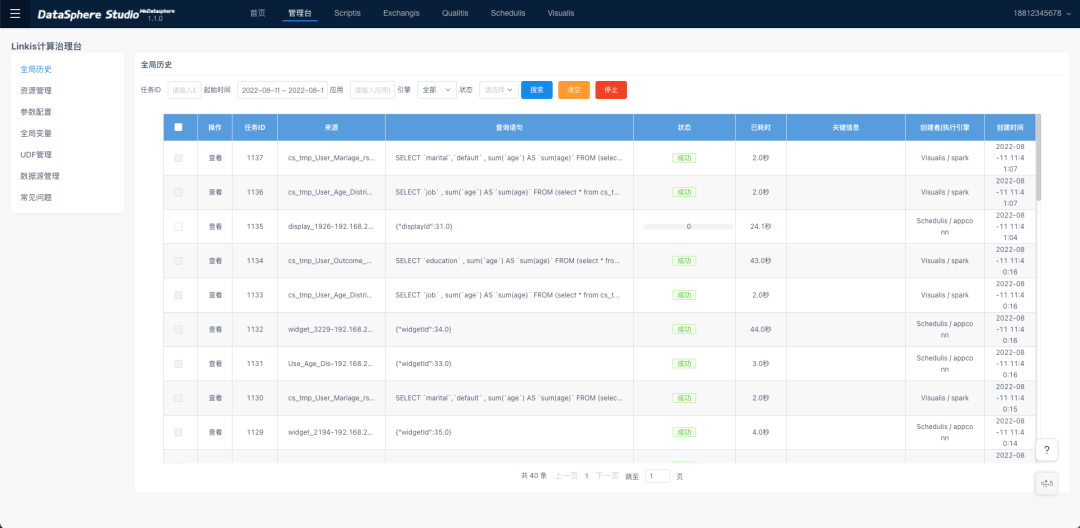
(2) Management platform: Linkis computing governance management platform, in this page can see the execution of all scripts, the management of global resources, the configuration of parameters and variables, data sources and UDF management, is a very important page;
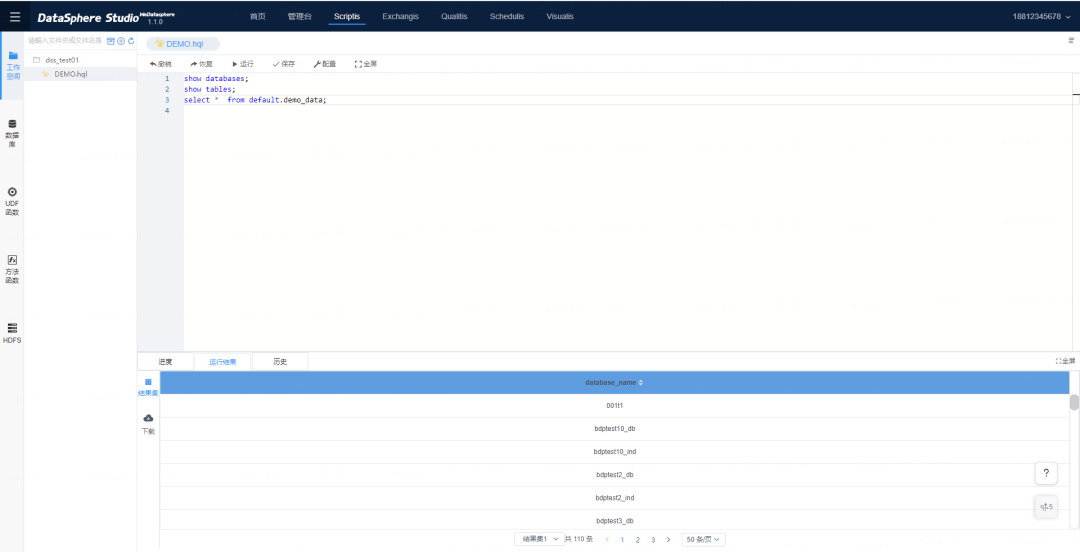
(3) Scriptis: a Web tool for data analysis that supports writing SQL, Pyspark, HiveQL and other scripts online and submits them to Linkis for execution, and supports enterprise-level features such as UDFs, functions, resource management and intelligent diagnosis. At present, the sandbox environment does not provide python and shell demos for security reasons.
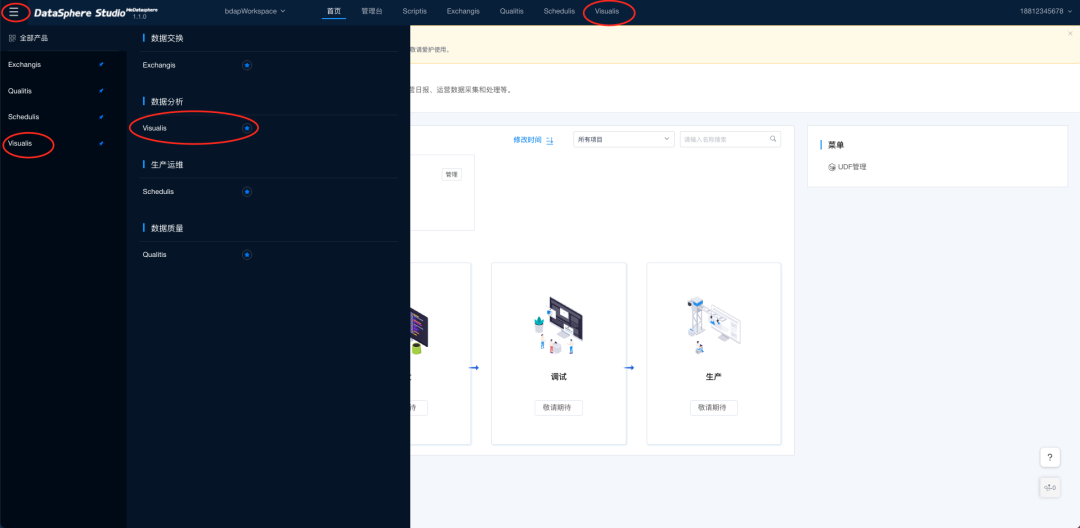
1.4 Navigation bar configuration
In order to use Qualitis, Scheduis, Visualis, Exchangis components more quickly, the corresponding entry can be added to the top navigation bar. How to do it: Click the entry in the upper left corner and add the corresponding component to the navigation bar.
2. Create the project and workflow
For security reasons, the sandbox environment does not support the ability to create projects and workflows. Developers can follow these steps in their own environments:
DSS supports the use of workflow approach, following me step by step to use.
(1)Click "Create Project" in the workspace "bdapWorkspace";

(2)Fill in the parameters for the project, as shown in the following screenshot
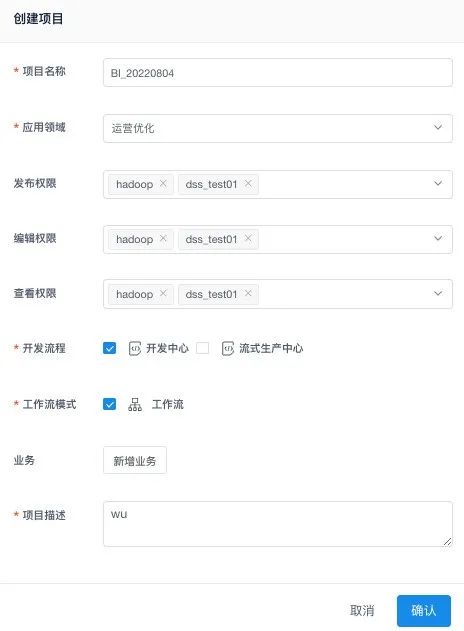
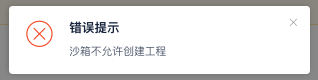
Because the sandbox environment prohibits project creation for security reasons, the following error is displayed. Build the DSS environment by yourself, you can create the project according to the above method.
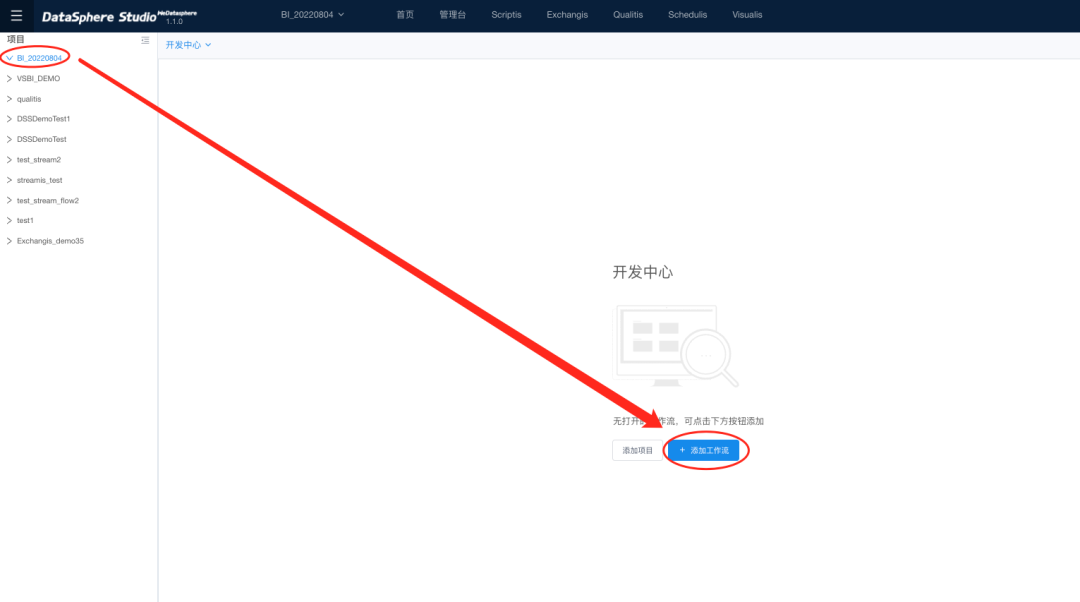
(3)After successful creation, you can see the project BI_20220804 on the home page;
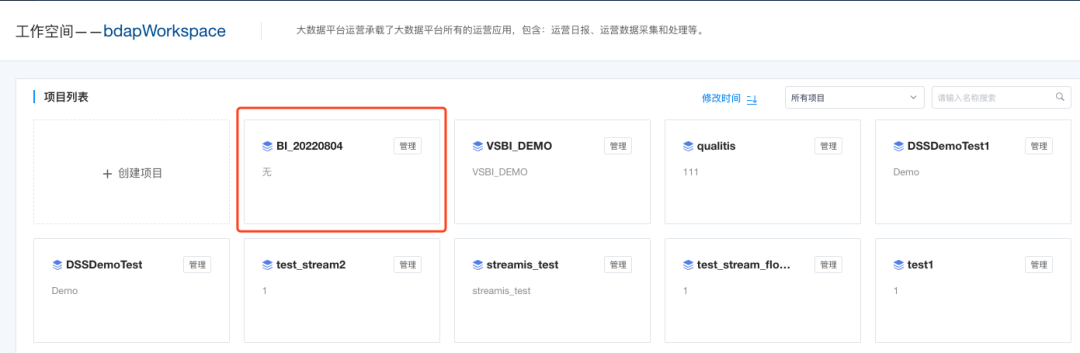
(4)Click to enter the created project "BI_20220804" and click Add workflow
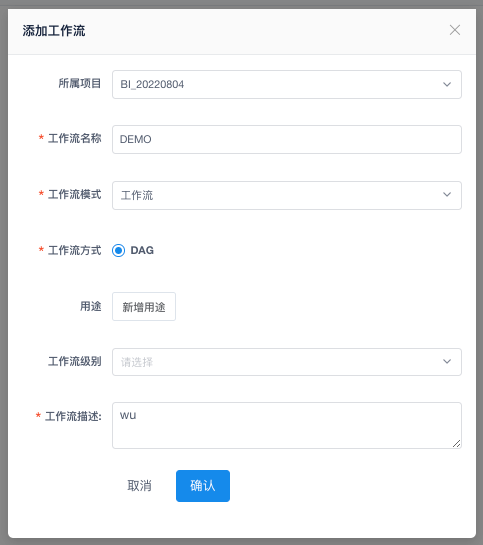
(5)Fill in the workflow information
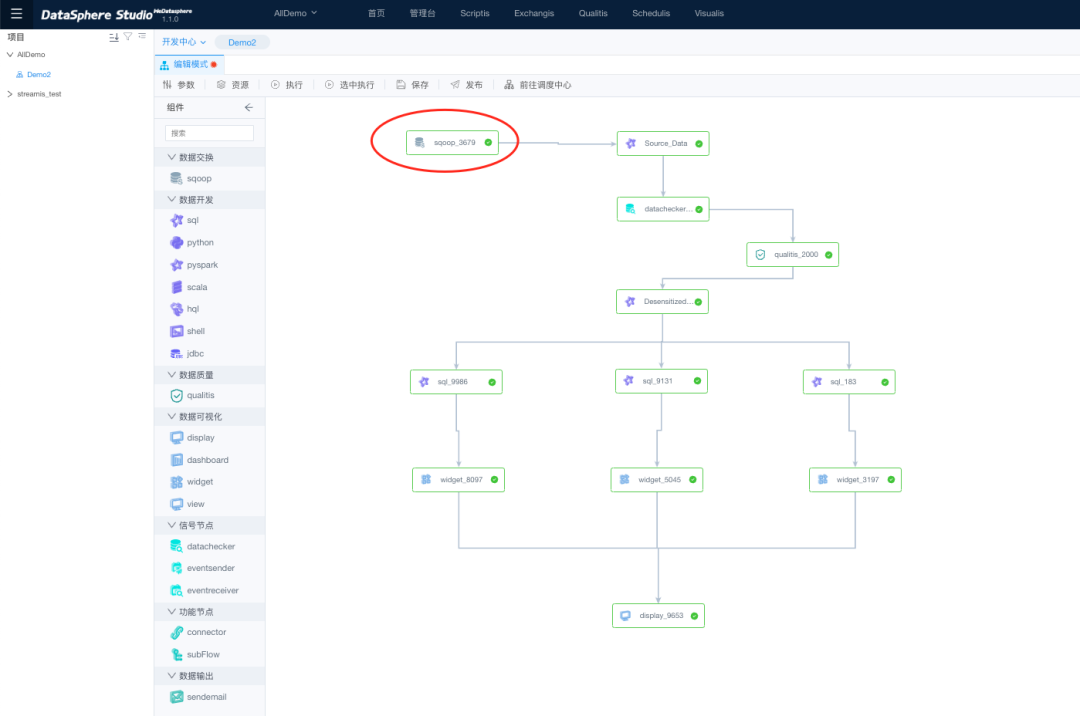
(6)Enter the project workflow DEMO, we can see the complete workflow interface;
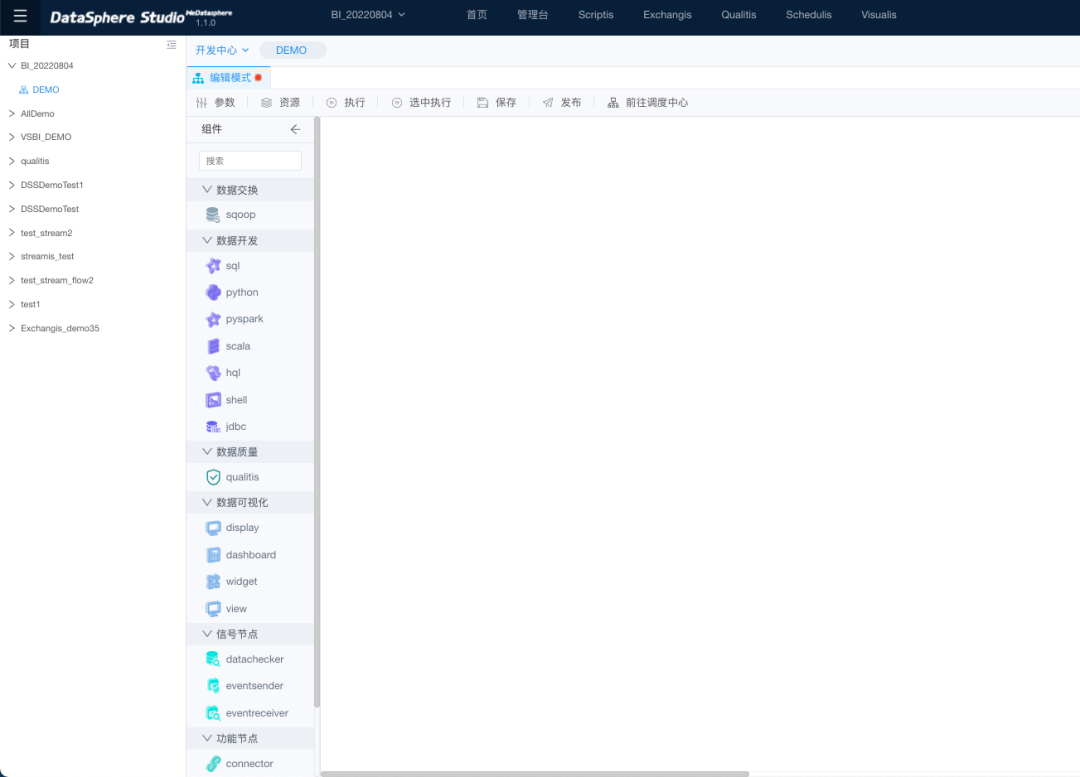
3. DEMO workflow component description
Currently, seven types of workflow nodes are supported, which can be used to complete tasks such as data synchronization, data analysis, data quality management, data visualization and so on.
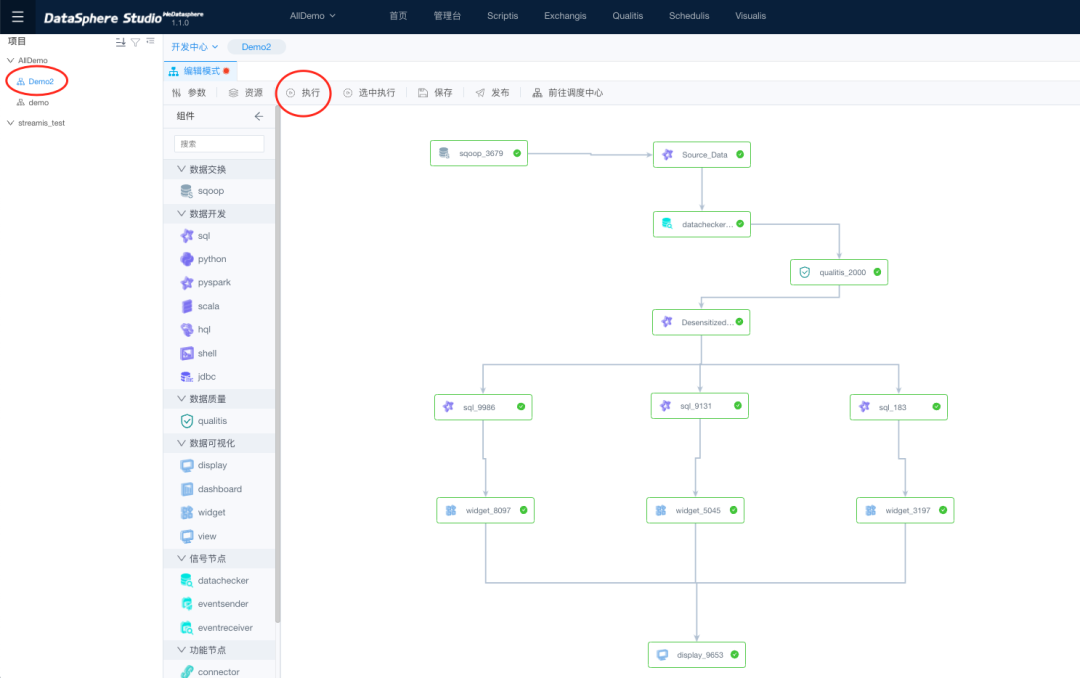
We go straight to AIIDEMO, hit Execute, and run the whole DEMO.
3.1 Data Exchange
Use sqoop nodes to allow data exchange between the dss and the target database.
(1)Double-click Data Sync on the data exchange node.
(2)On the page for editing nodes, you can view the node details. Synchronize data from Hvie to MYSQL;
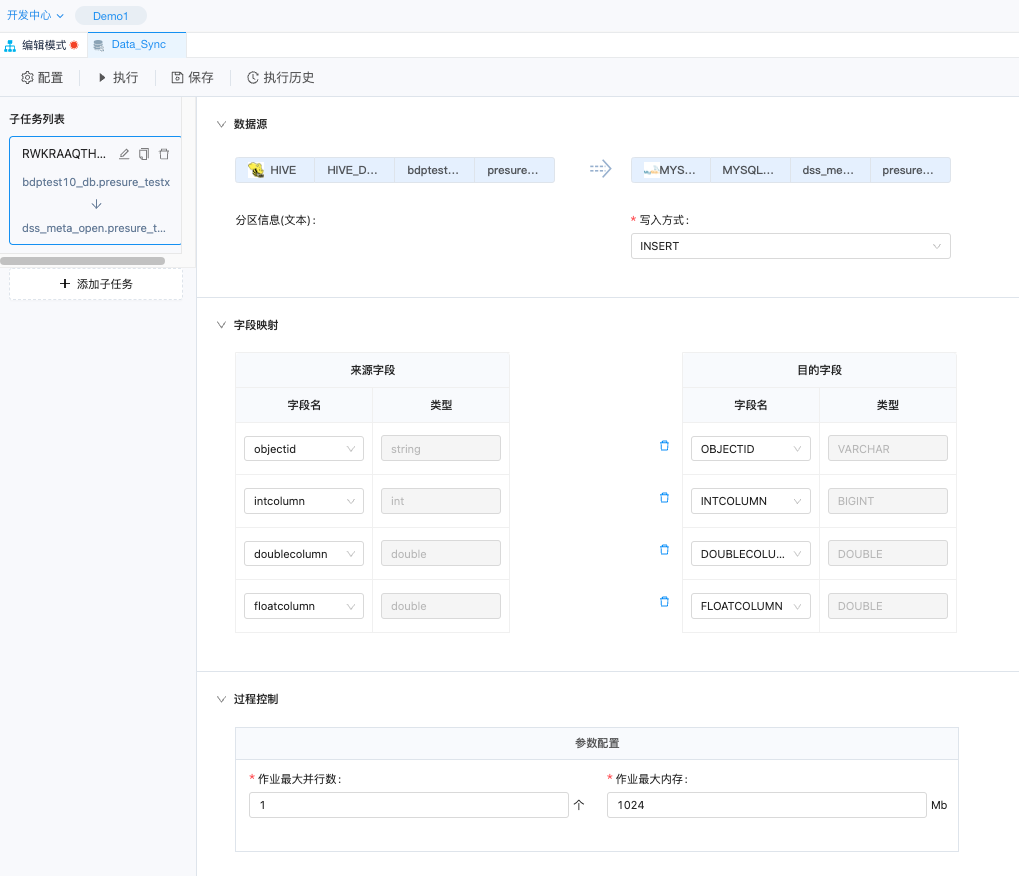
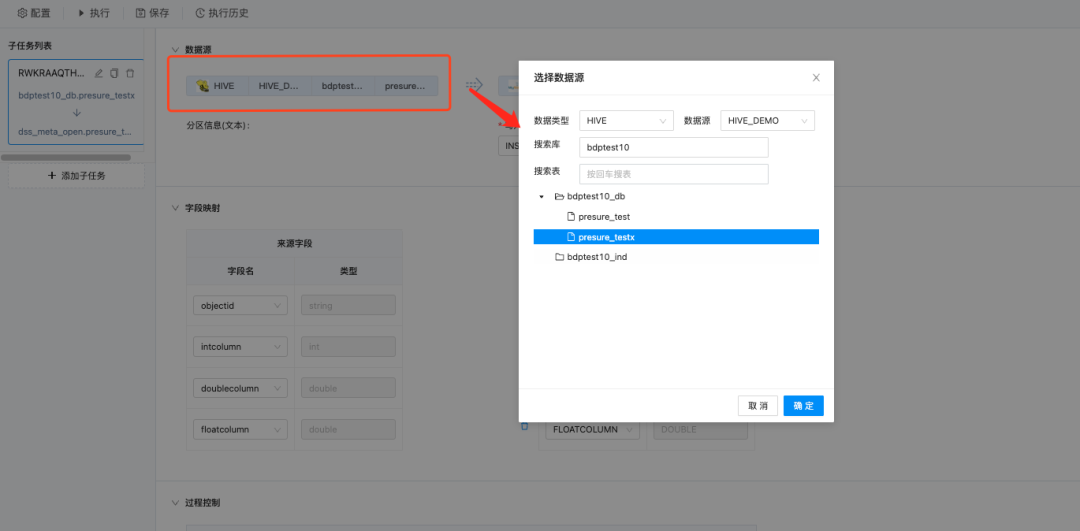
(3)Click Data source Hive, and the data source configuration details are displayed in the popup window. The data source is "bdptest10_db.presure_testx".
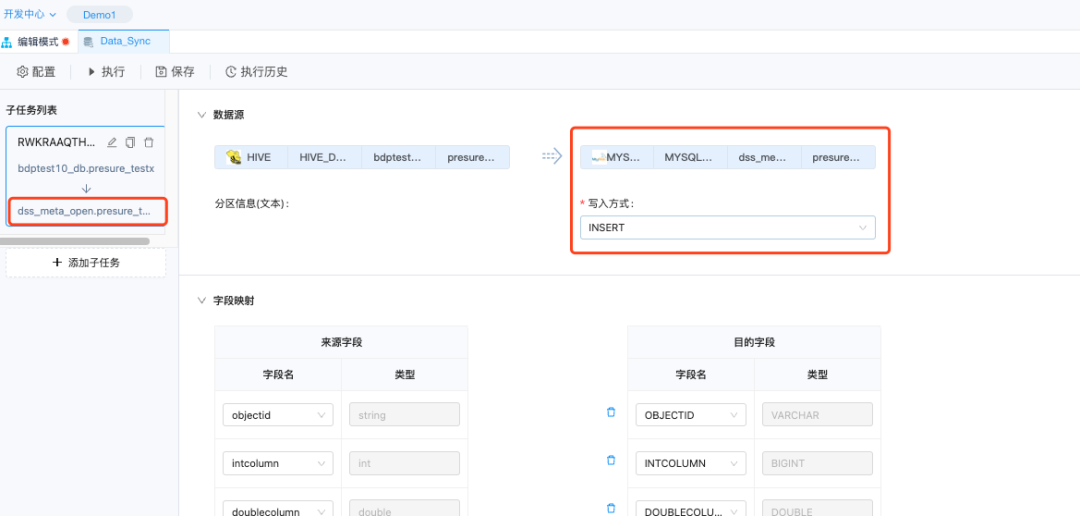
(4)Click on the database you want to sync to: dss_meta_open.presure_testx
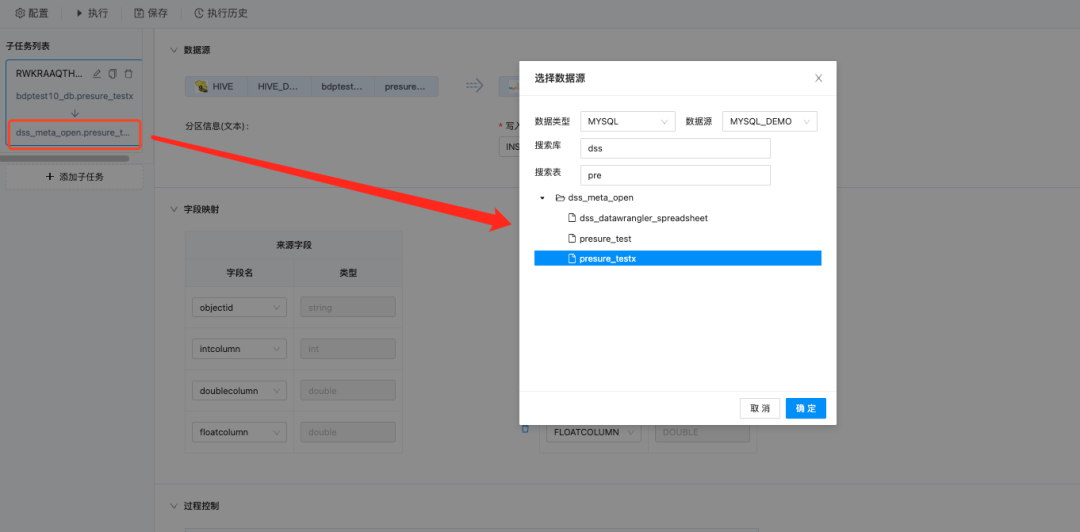
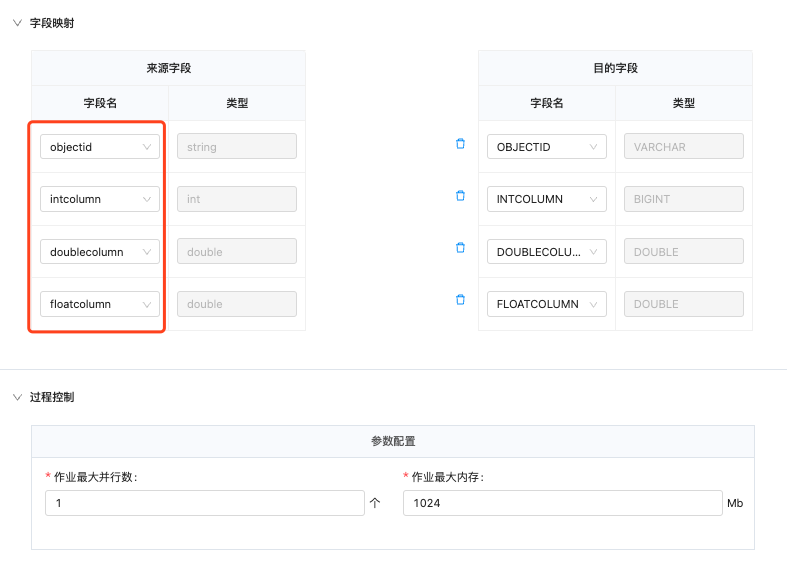
(5)The following fields are synchronized: objectid, intcolumn, doublecolumn, and floatcolumn.
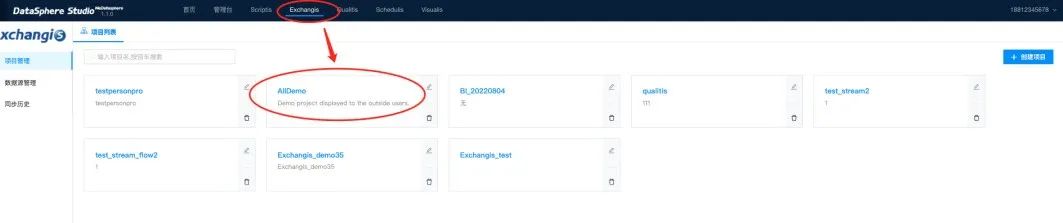
(6)You can also access the component page through "Exchangis" in the top navigation bar to view all data exchange nodes and manage data exchange.
3.2 Data development
Supports languages such as sql, python, pyspark, and shell for data development. Drag the node out directly, and then double-click to enter the node interface to write code.
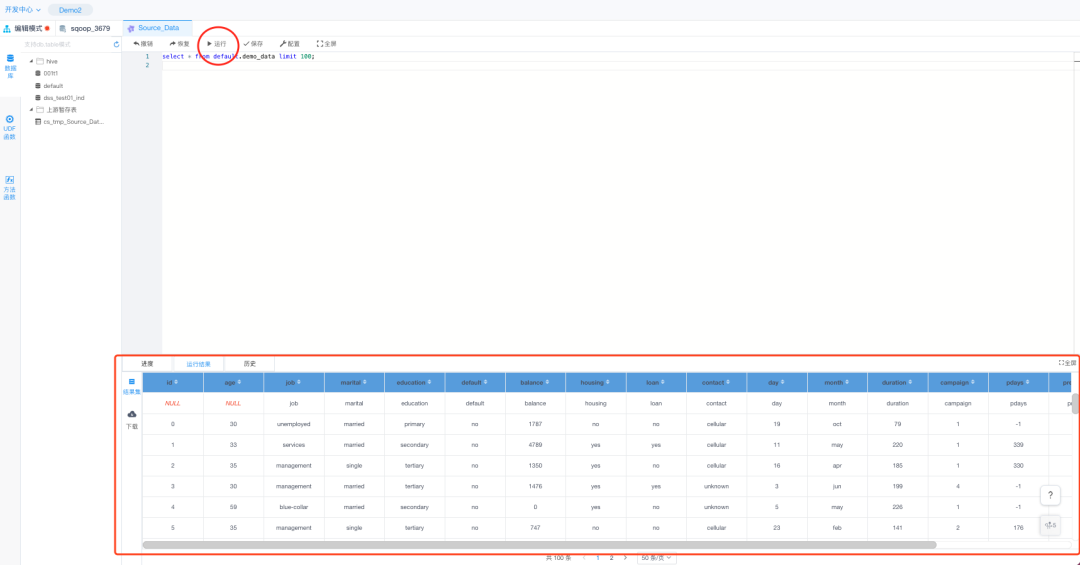
(1)We double click the "source_data" node in the DEMO;

(2)Enter the editing interface, write the corresponding script language, execute, you can get the relevant execution results;
3.3 Data quality
Data quality is verified using qualitis.
(1)Click on the data quality node "qualitis_200"
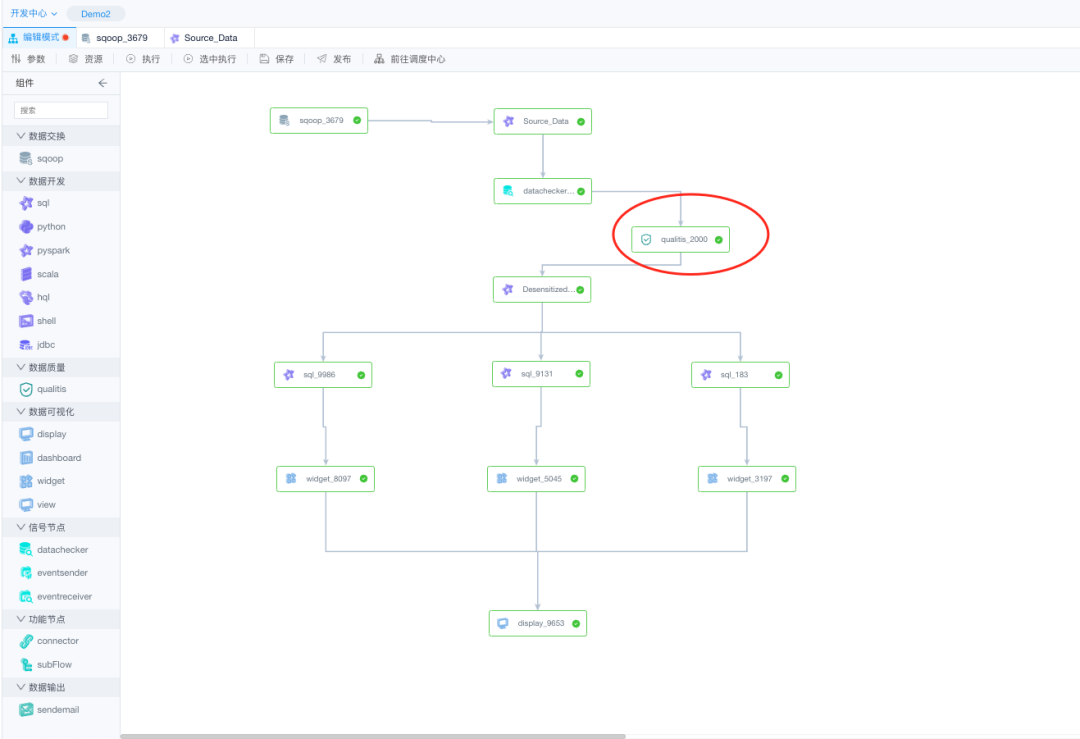
(2)The data verification page is displayed, and the configured verification rule is displayed.
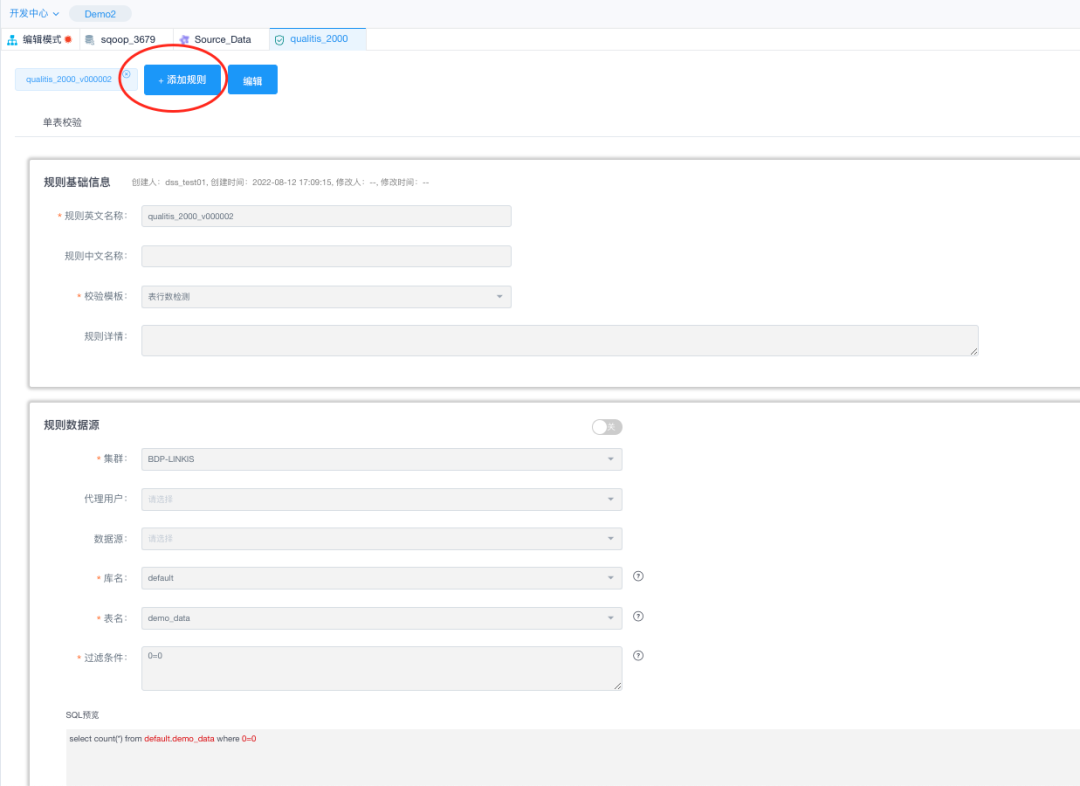
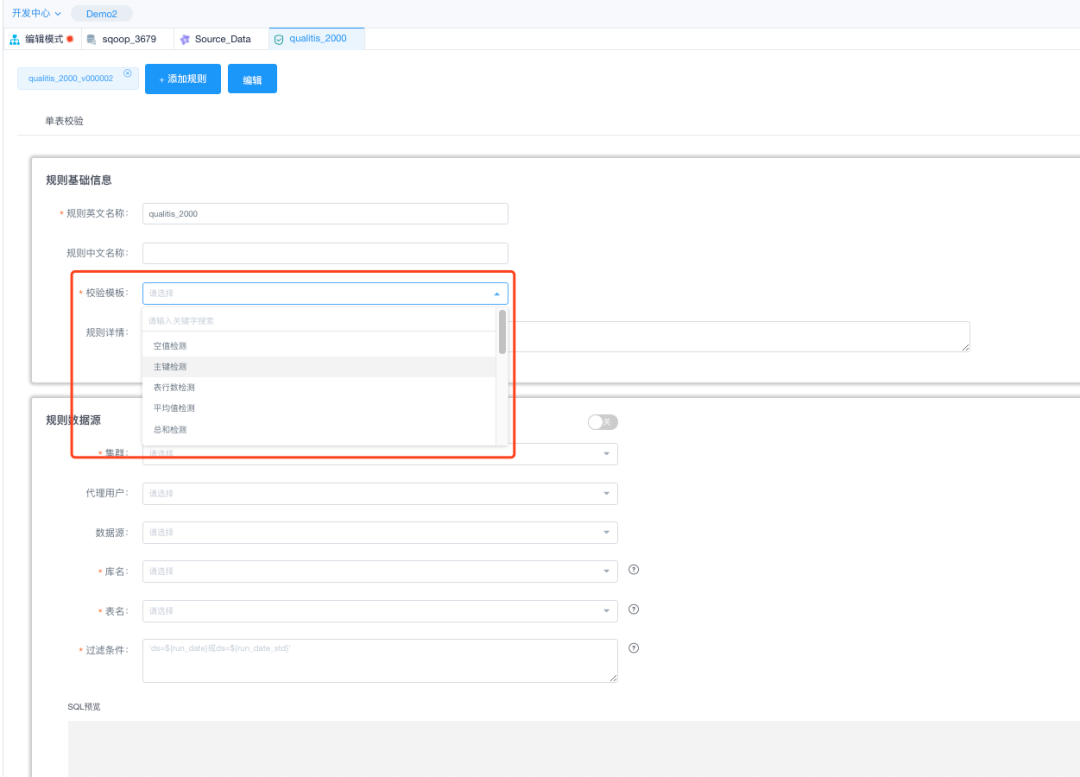
(3)Select a different verification template by clicking the Add rule in the figure above;
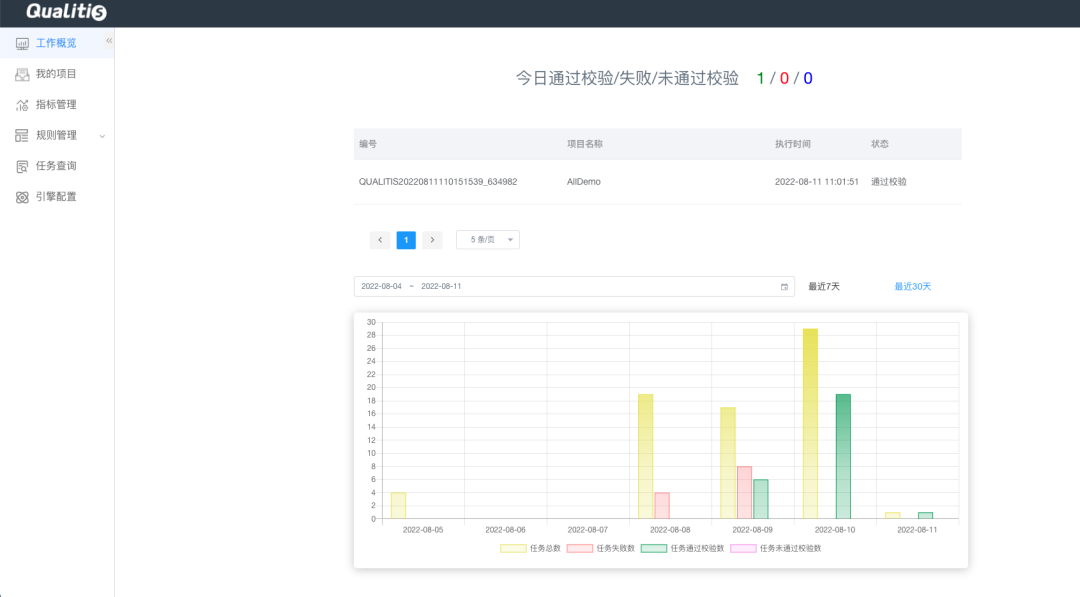
(4)Access the data Quality admin desk directly by clicking on the top navigation menu "Qualitis".
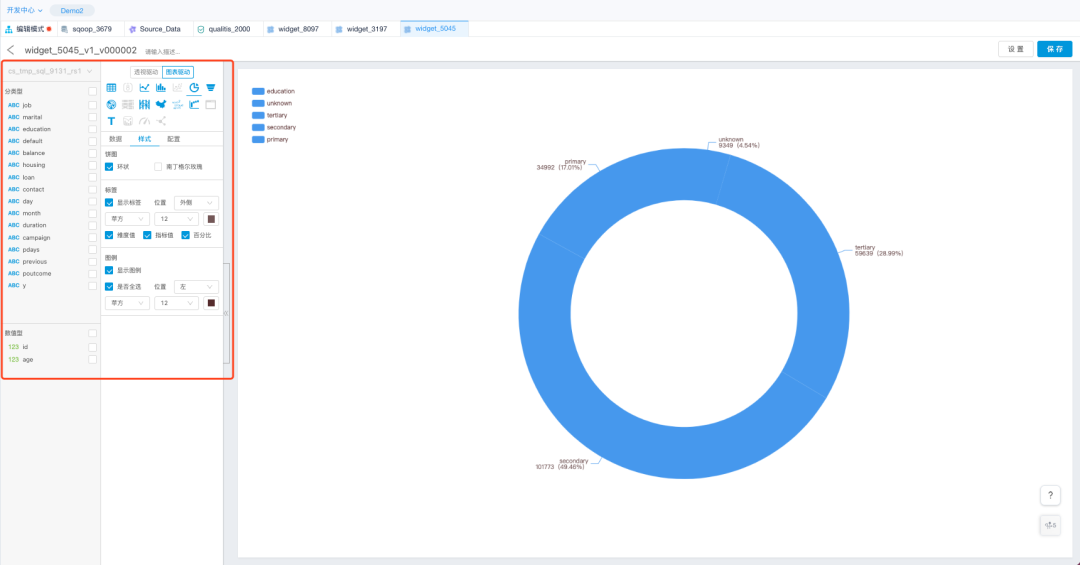
3.4 visualization
Use the visualis component for visual BI analysis. In the sandbox environment, there are DEMO complete examples can be referred to.
(1)Select the item and click "Execute". Wait until all the execution succeeds.
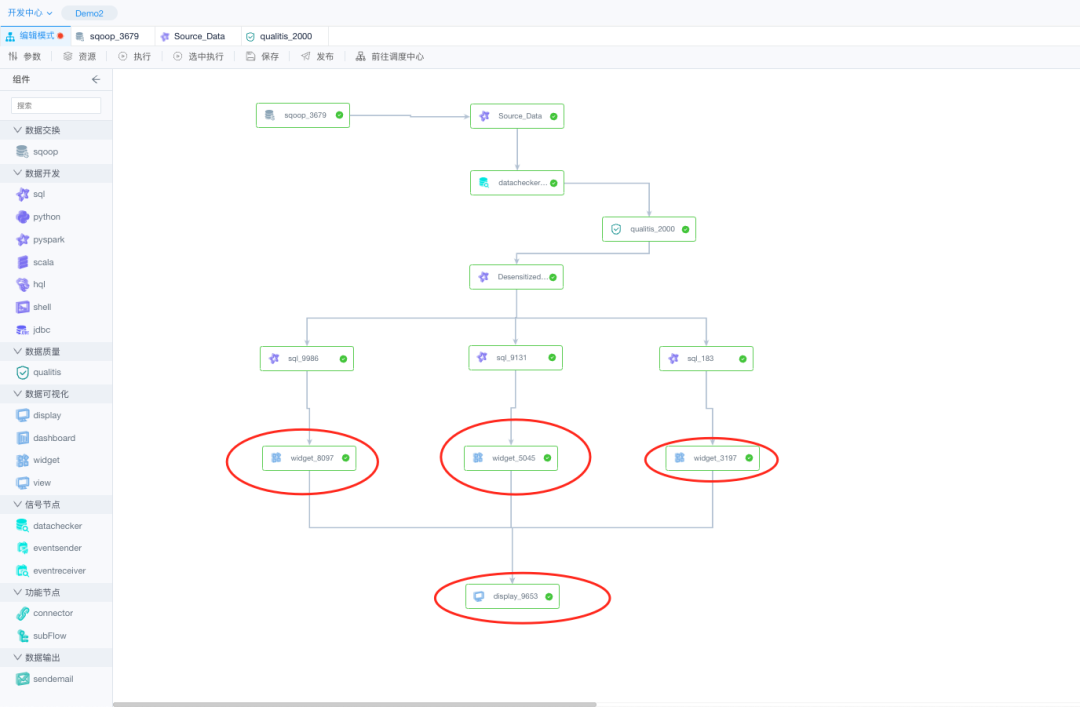
(2)Click the corresponding data visualization node to see the generated data chart.

(3)You can go directly to the Visualization Console by clicking on the top navigation menu "Visualis", where you can see the components related to visualization.
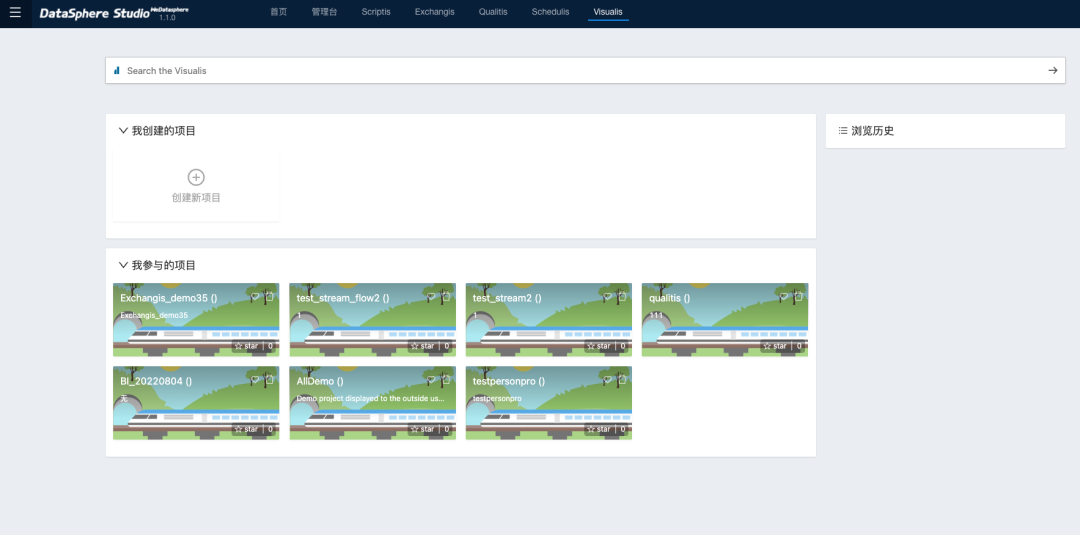
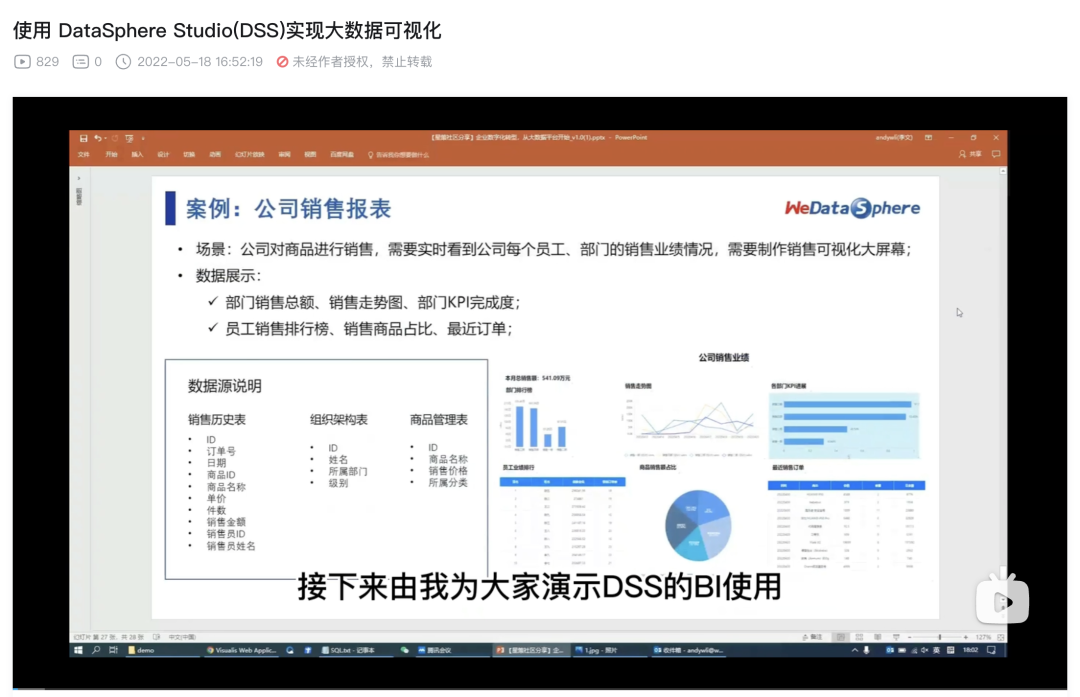
(4)For a more detailed look at visualization capabilities, check out the video tutorial Big Data Visualization Using DataSphere Studio(DSS) :https://www.bilibili.com/video/BV1xY4y1t7Ma
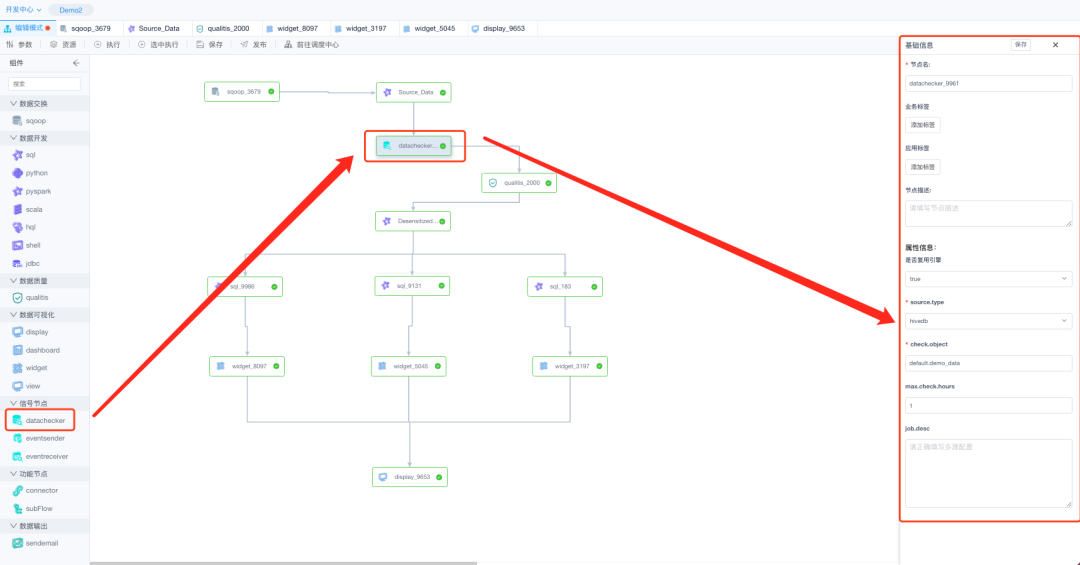
3.5 Signal node
Currently, three function nodes are supported: datachecker, eventsender, and eventreceiver. Common scenarios for signal nodes:
You can use datachecker to check whether the data is complete before running a batch task.
After the completion of a certain work, you need to notify other workflows to do the work, and use eventsender to send the notification;
Use the eventreceiver to monitor signals. After receiving signals from the eventsender, the corresponding work task is executed.
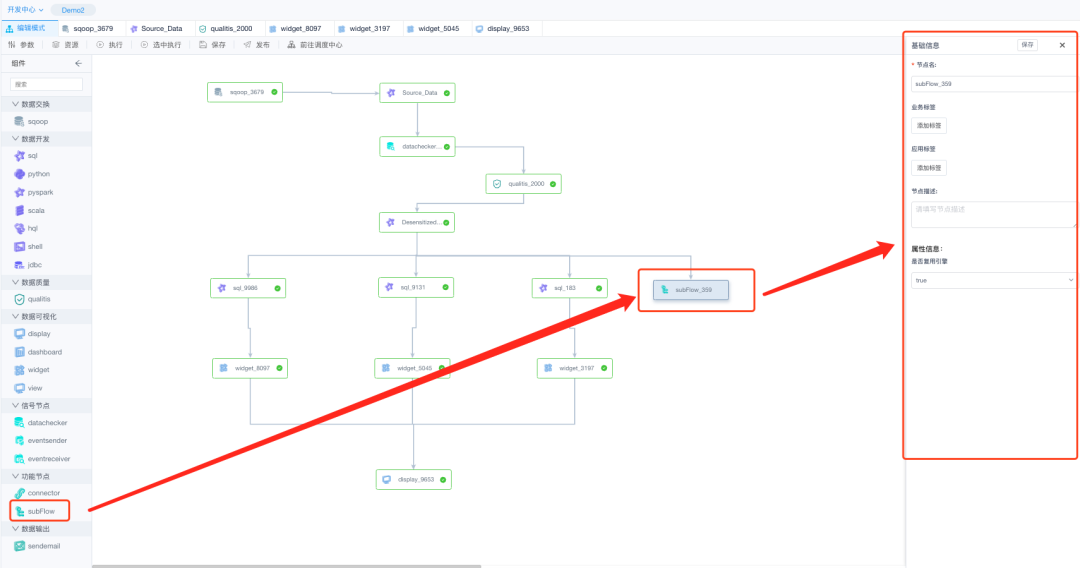
3.6 Function Nodes
connector and subFlow nodes are supported.
(1)The connector node serves only as a connection node for a workflow and does not perform any functions.
(2)A subFlow is a sub-workflow node that can be understood as a separate workflow. In complex workflow scenarios, subFlow nodes can be used to simplify the main workflow process.
3.7 Data Output
支持通过邮件发送的方式
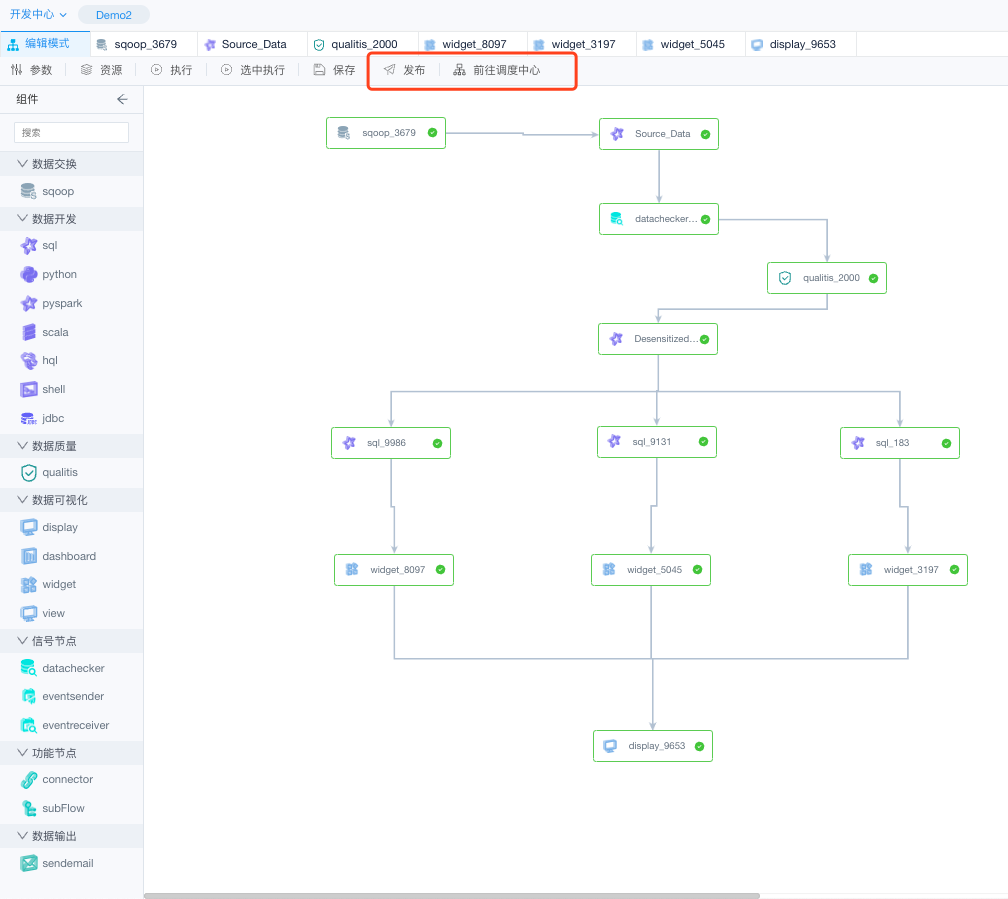
3.8 Dispatching Center
(1) After we finish the workflow development and testing in the edit mode, we can click the "Publish" button to publish it directly to the dispatch center.

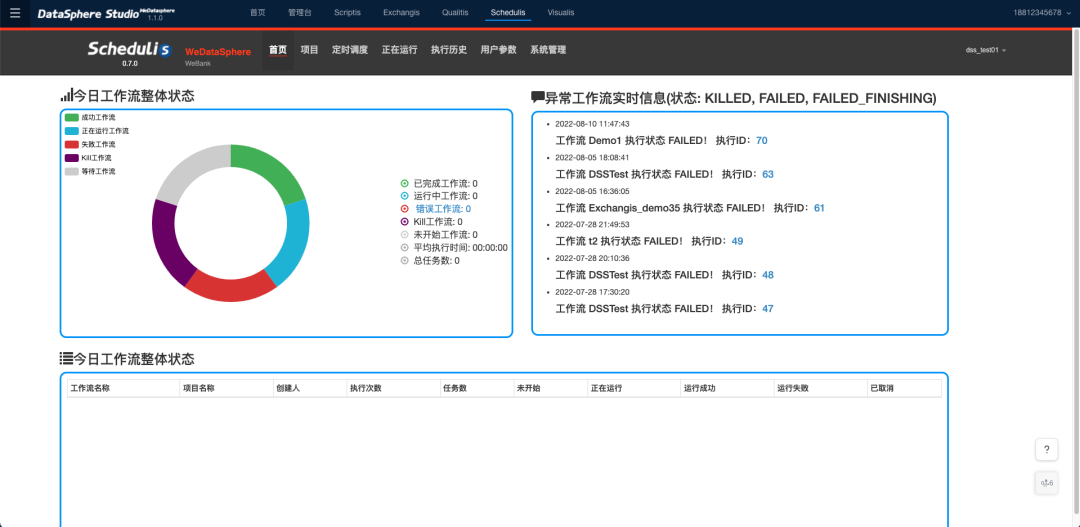
(2) Click "Go to the Dispatch Center" or enter the management desk of the dispatch center through "Schedulis" at the top of the navigation. You can perform scheduling management and view workflow status in the scheduling center.
4. Common mistakes
Currently, only a few features are available for community developers to experience in the sandbox environment. Using the sandbox environment can help developers quickly understand the WDS ecosystem.
For security purposes, only the query, query, and execution functions are provided in the sandbox environment. For example, error messages such as "Only limited query operations are allowed in the sandbox environment", "No project is created in the sandbox environment", or "The background interface is abnormal. Please contact development.
If you have any questions, please contact the assistant on wechat for feedback.