How to Develop A New Microservice
This article introduces how to develop, debug and deploy a new microservice in the local area based on the existing Linkis microservice architecture, so as to facilitate the need for logs of new applications.
Mind mapping:
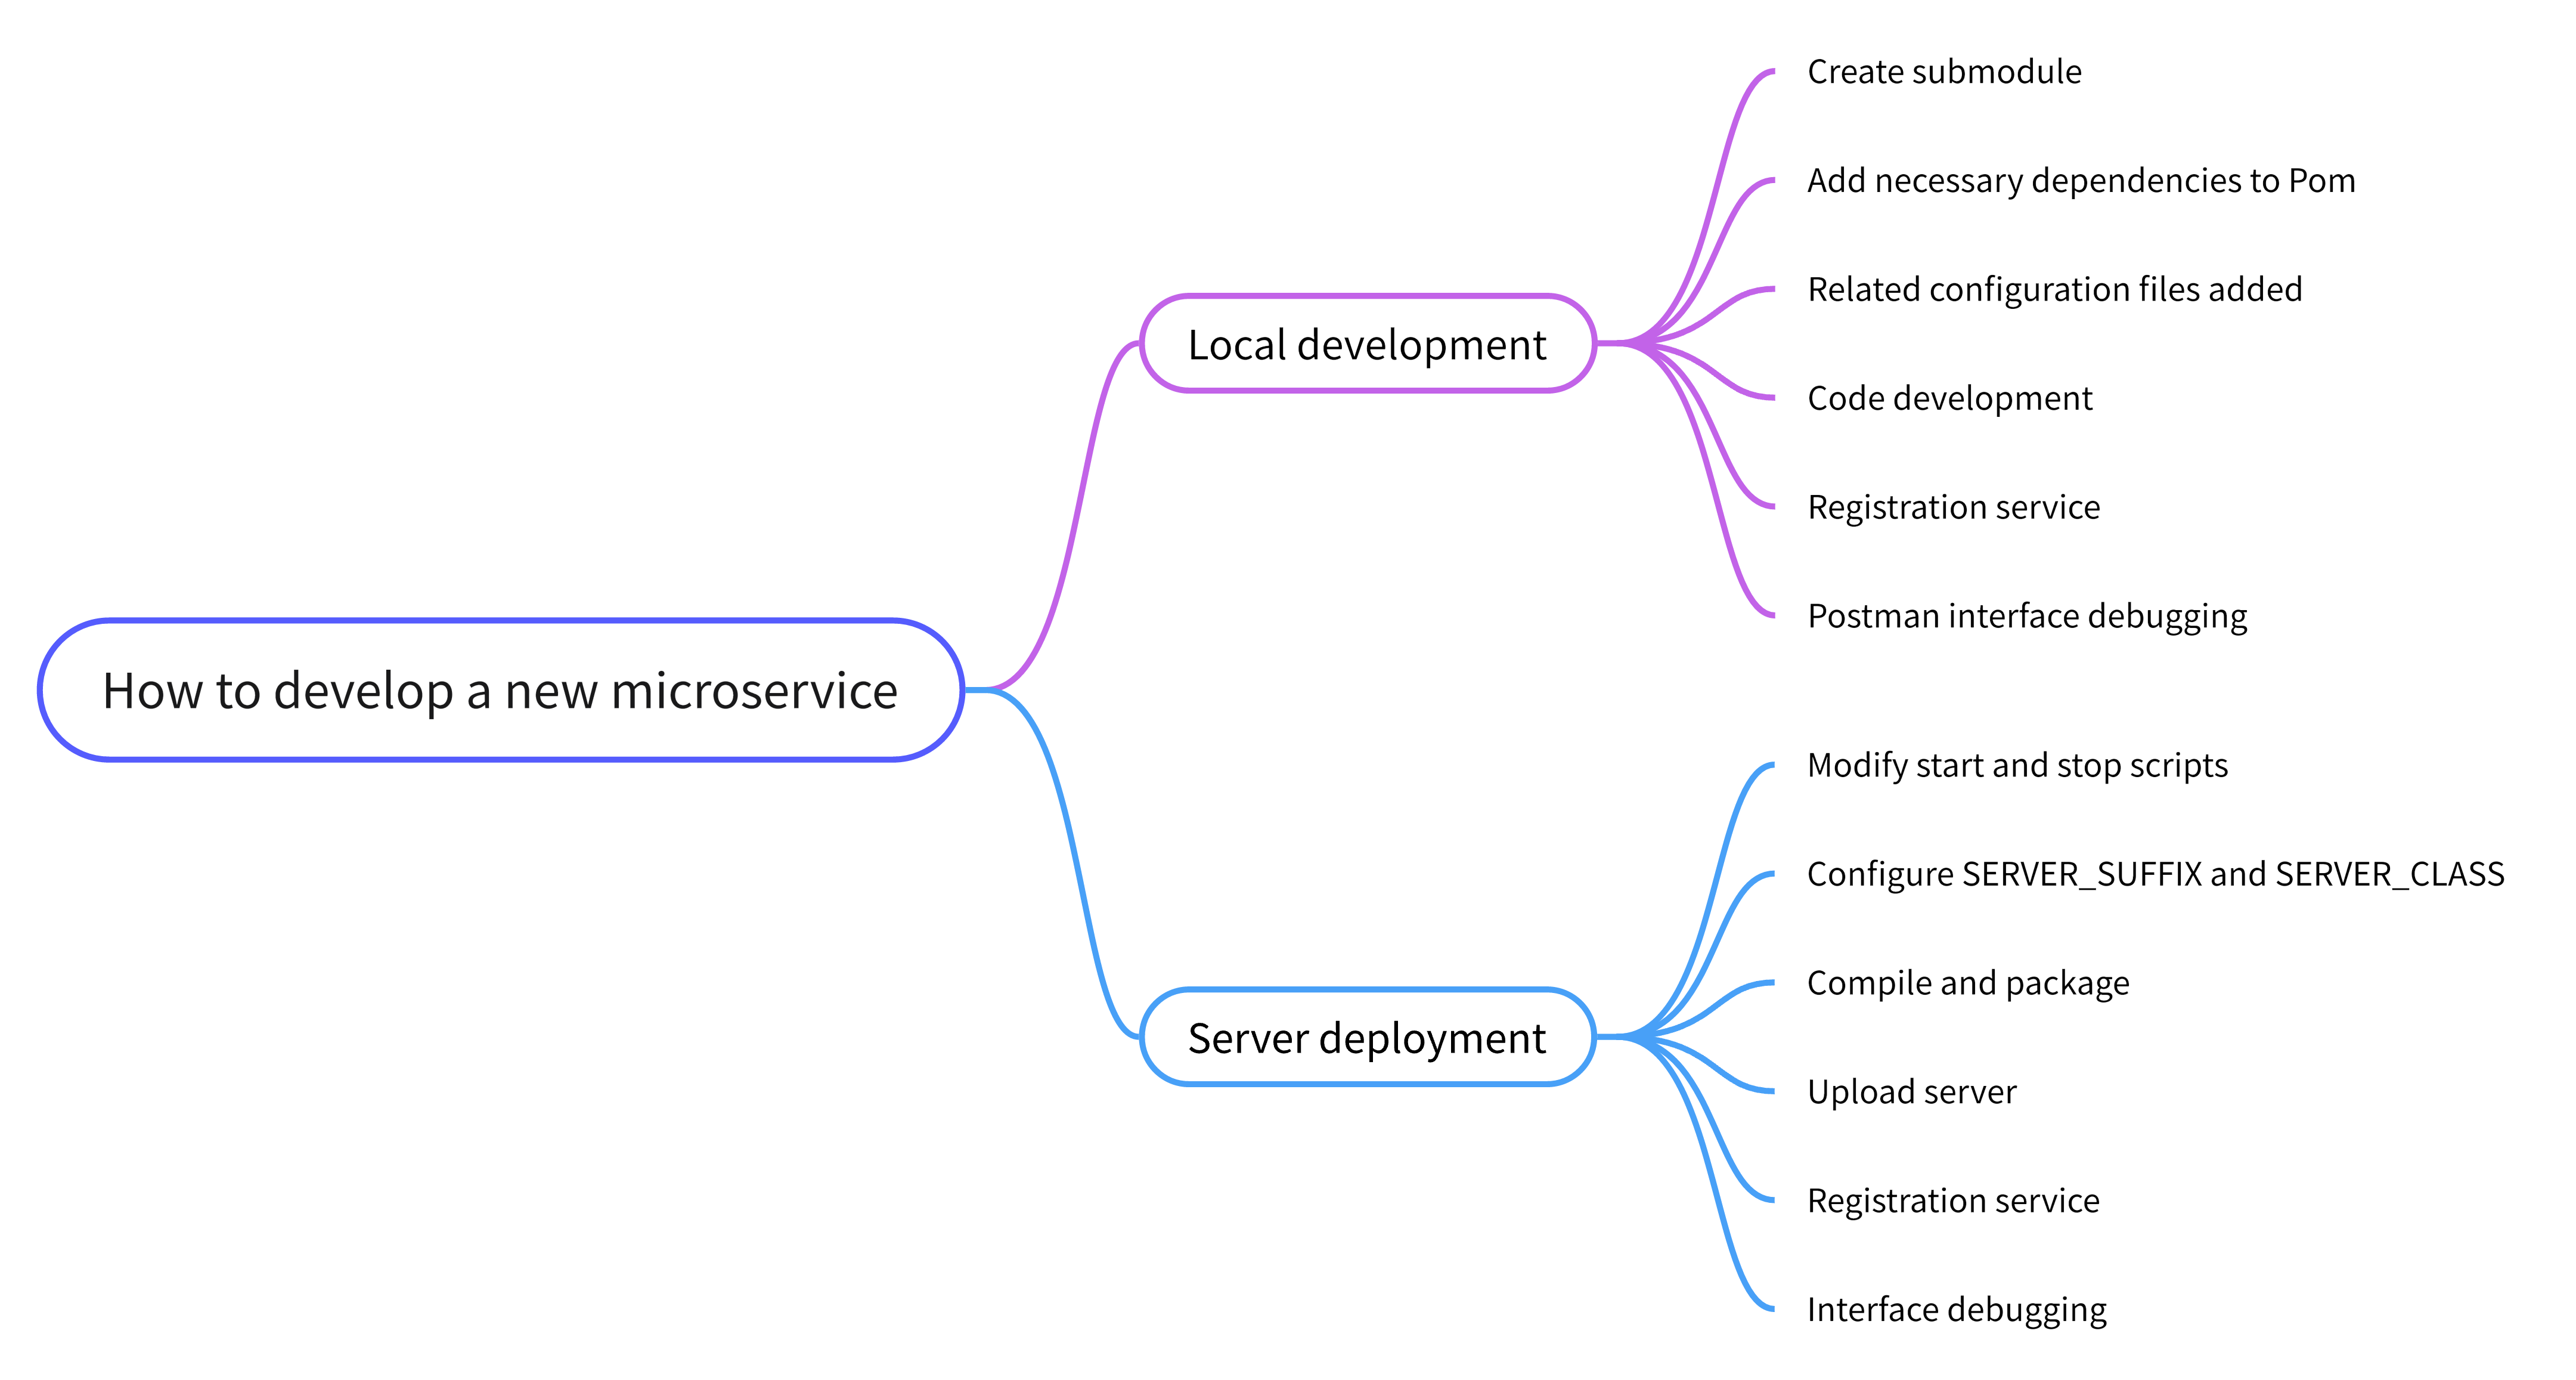
1. New microservice development
This article introduces the new microservice
linkis-new-microserviceas an example. How to create and register a new microservice belonging to linkis in IDEA
Software requirements
- jdk1.8
- maven3.5+
1.1 Create a new submodule
Note: The new sub-module under which module is not fixed and depends on the situation. Generally, it is divided and confirmed by service group. Here is just an example.
- Right click under the linkis-public-enhancements module
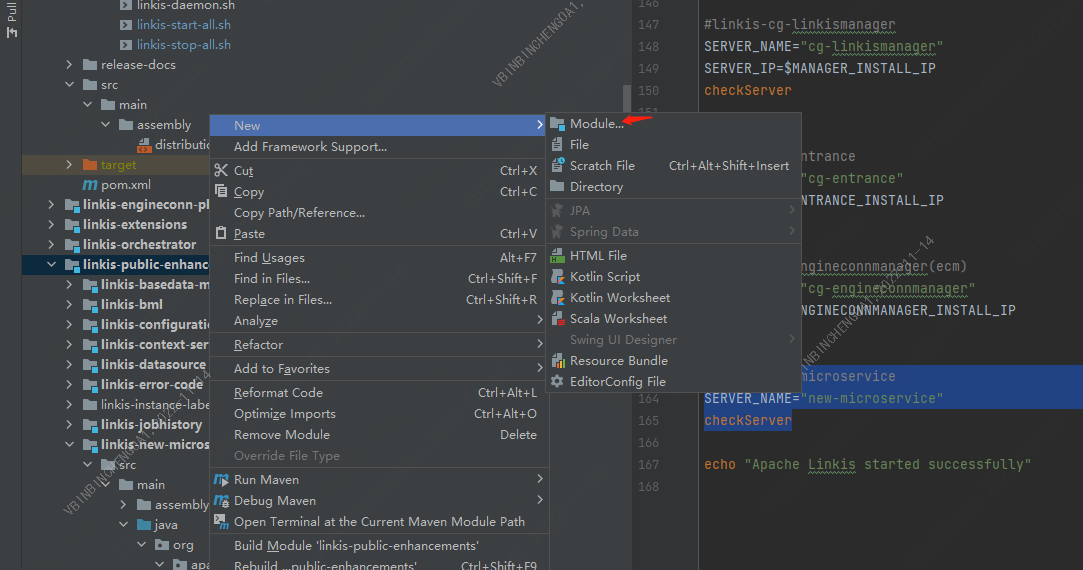
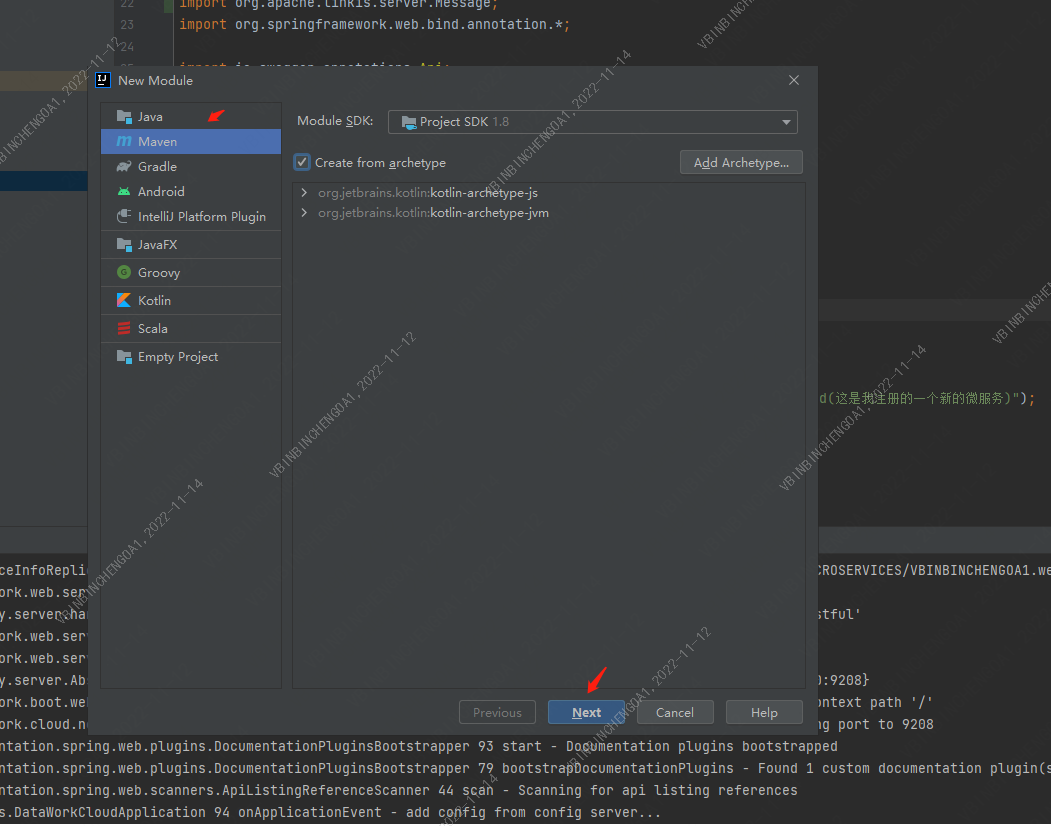
- Select maven and click Nex to next step
- Enter the module name and click Finsh
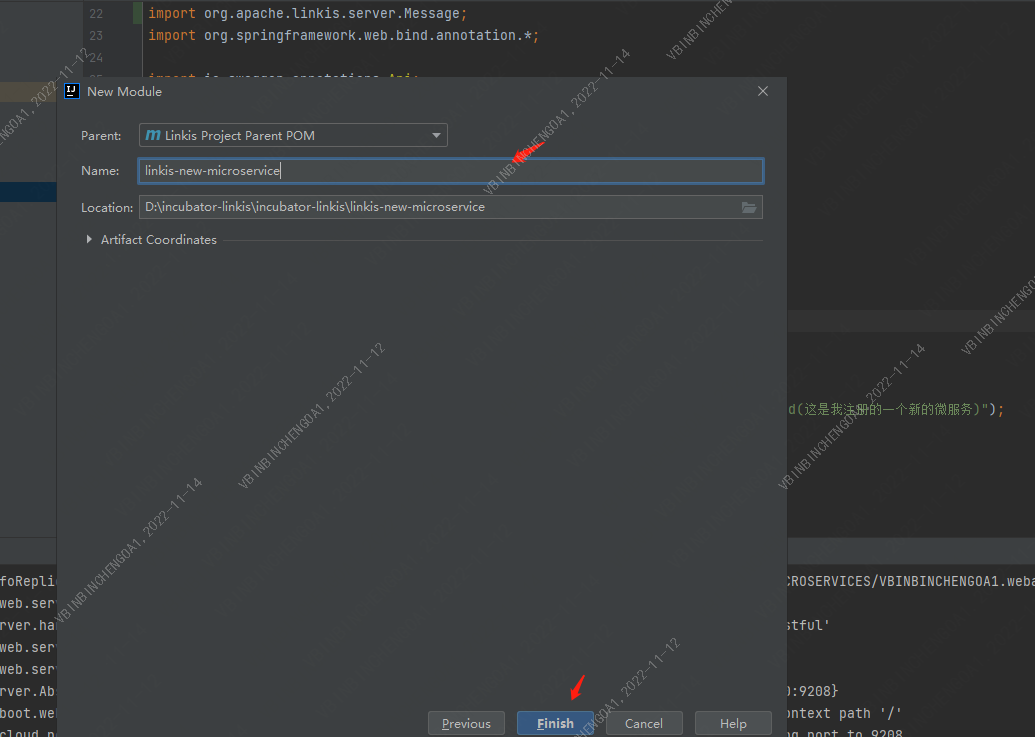
- Created successfully
1.1.1 Modify the pom.xml file of the linkis-new-microservice module
path: linkis-public-enhancements/linkis-new-microservice/pom.xml
## Add the public dependency module of linkis and the mybatis module dependency (if it does not involve database operations, you can not add mybatis)
  <dependency>
      <groupId>org.apache.linkis</groupId>
      <artifactId>linkis-module</artifactId>
      <version>${project.version}</version>
      <exclusions>
        <exclusion>
          <groupId>org.ow2.asm</groupId>
          <artifactId>asm</artifactId>
        </exclusion>
      </exclusions>
  </dependency>

  <dependency>
      <groupId>org.apache.linkis</groupId>
      <artifactId>linkis-mybatis</artifactId>
      <version>${project.version}</version>
  </dependency>
1.1.2 Add configuration files corresponding to new services
The configuration file is named according to linkis-service name.properties, and placed in the
linkis-dist/package/conf/directory. When the service starts, the linkis.properties general configuration file and the linkis-service name.properties configuration file will be loaded
Add linkis-new-microservice.properties configuration file
path: linkis-dist/package/conf/linkis-new-microservice.properties
#
# Licensed to the Apache Software Foundation (ASF) under one or more
# contributor license agreements.  See the NOTICE file distributed with
# this work for additional information regarding copyright ownership.
# The ASF licenses this file to You under the Apache License, Version 2.0
# (the "License"); you may not use this file except in compliance with
# the License.  You may obtain a copy of the License at
# http://www.apache.org/licenses/LICENSE-2.0
# Unless required by applicable law or agreed to in writing, software
# distributed under the License is distributed on an "AS IS" BASIS,
# WITHOUT WARRANTIES OR CONDITIONS OF ANY KIND, either express or implied.
# See the License for the specific language governing permissions and
# limitations under the License.
#


## If you do not need to provide interface Api, you do not need to add this configuration
##restful
wds.linkis.server.restful.scan.packages=org.apache.linkis.newmicroservice.server.restful

## mybatis Configuration of data manipulation items
wds.linkis.server.mybatis.mapperLocations=classpath*:org/apache/linkis/newmicroservice/server/dao/mapper/*.xml
wds.linkis.server.mybatis.typeAliasesPackage=org.apache.linkis.newmicroservice.server.domain
wds.linkis.server.mybatis.BasePackage=org.apache.linkis.newmicroservice.server.dao


## Never use the same port as other services
spring.server.port=9208
1.1.4 Enable debug mode
It is convenient to debug the interface, no need to verify the login status
path: linkis-dist/package/conf/linkis.properties

wds.linkis.test.mode=true   # Turn on test mode
wds.linkis.test.user=hadoop # Specify which user to proxy all requests to in test mode
1.2 Code Development
To make it easier for everyone to learn, let's take creating a simple API interface as an example.
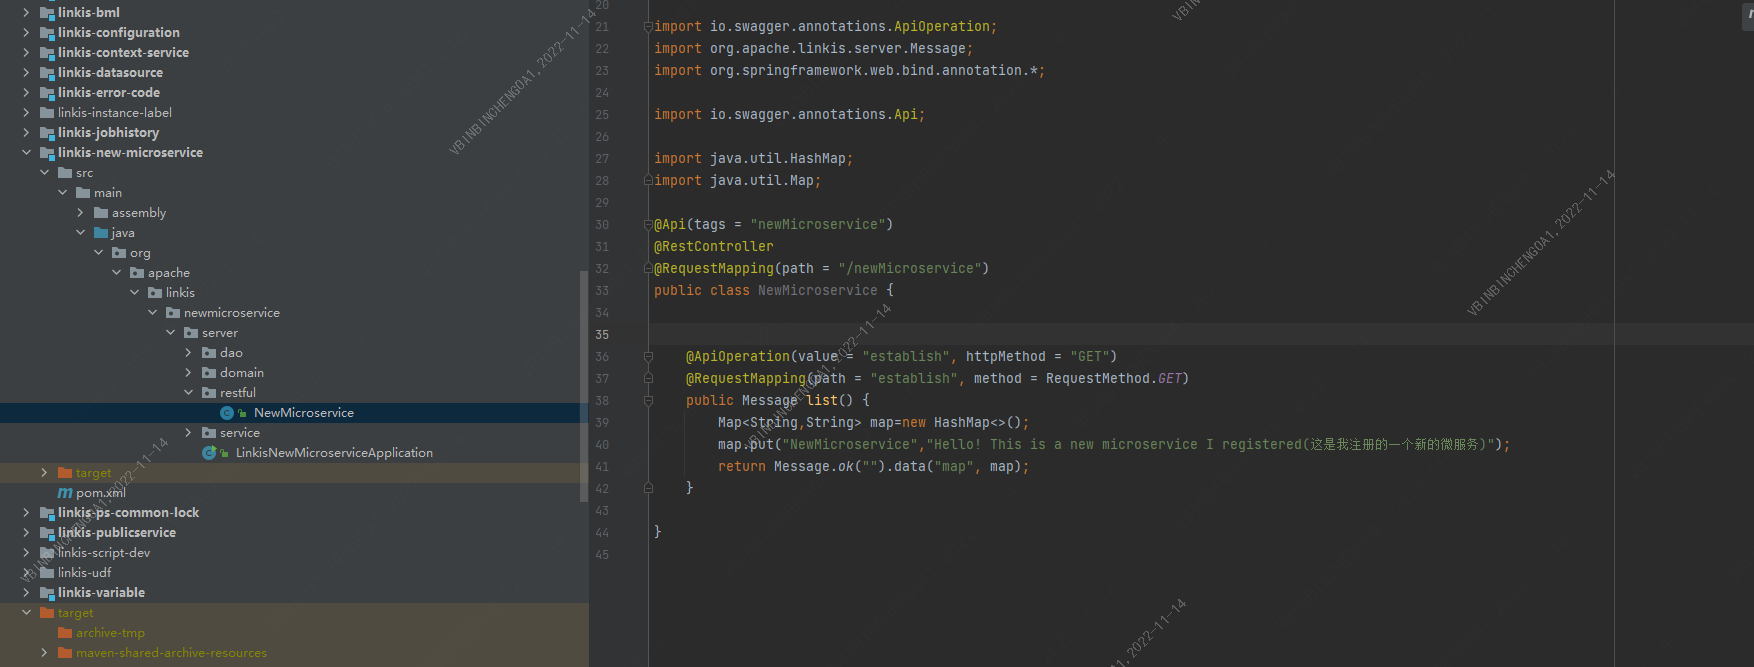
1.2.1 Create a new interface class
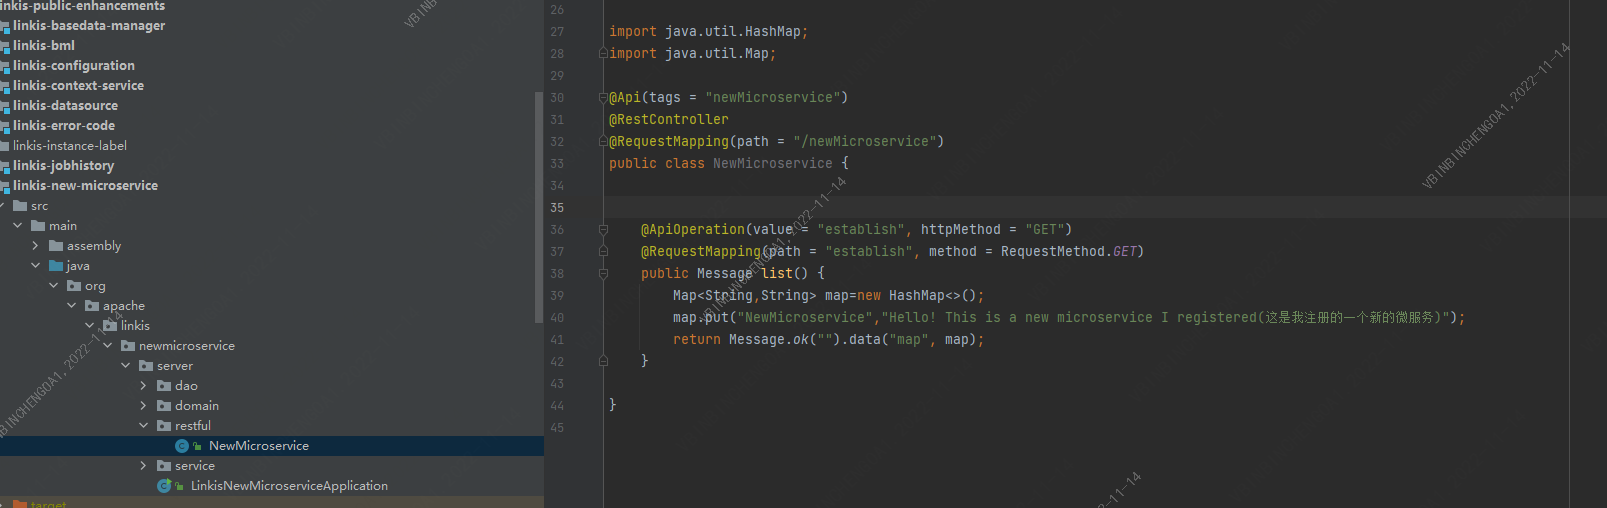
package org.apache.linkis.newmicroservice.server.restful;
import io.swagger.annotations.ApiOperation;
import org.apache.linkis.server.Message;
import org.springframework.web.bind.annotation.*;
import io.swagger.annotations.Api;
import java.util.HashMap;
import java.util.Map;
@Api(tags = "newmicroservice")
@RestController
@RequestMapping(path = "/newmicroservice")
public class NewMicroservice {
@ApiOperation(value = "establish", httpMethod = "GET")
@RequestMapping(path = "establish", method = RequestMethod.GET)
public Message list() {
Map<String,String> map=new HashMap<>();
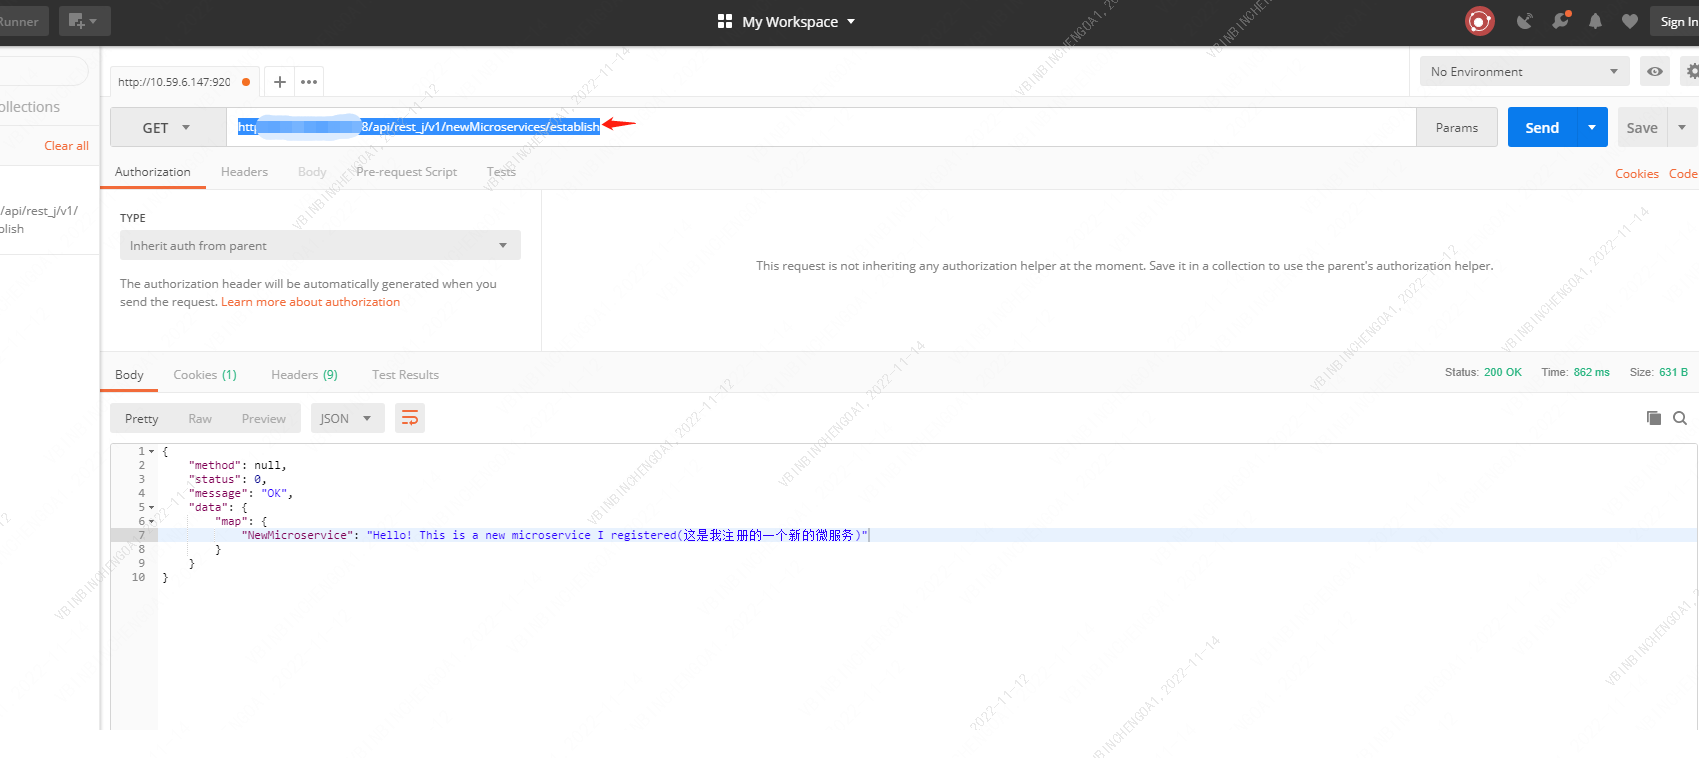
map.put("NewMicroservice","Hello! This is a new microservice I registered(这是我注册的一个新的微服务)");
return Message.ok("").data("map", map);
}
}
1.2.2 new startup class
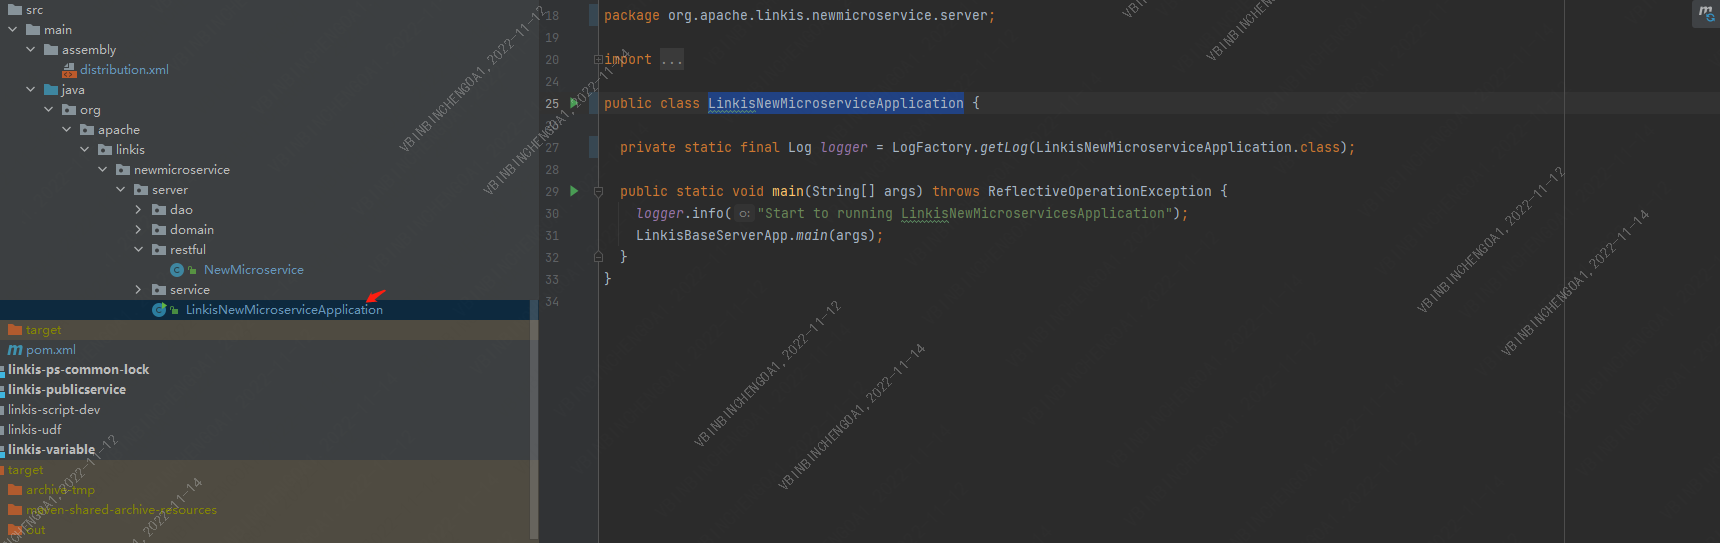
package org.apache.linkis.newmicroservice.server;

import org.apache.linkis.LinkisBaseServerApp;

import org.apache.commons.logging.Log;
import org.apache.commons.logging.LogFactory;

public class LinkisNewMicroserviceApplication {

  private static final Log logger = LogFactory.getLog(LinkisNewMicroserviceApplication.class);

  public static void main(String[] args) throws ReflectiveOperationException {
    logger.info("Start to running LinkisNewmicroserviceApplication");
    LinkisBaseServerApp.main(args);
  }
}
1.3 Start eureka service
The specific guidelines for this step have been written in the Debugging Guidelines document and can be directly accessed, so I won’t introduce too much here
1.4 Start the new microservice locally
Set the startup Application of linkis-new-microservice
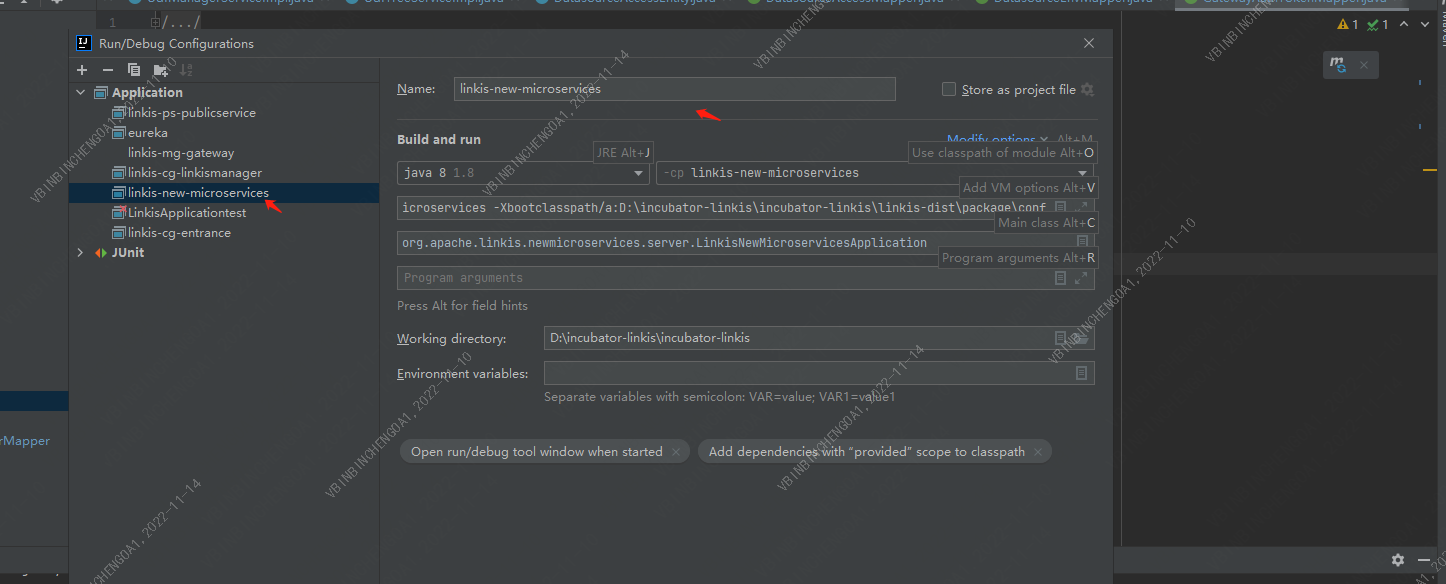
parameter explanation:
[Service Name]
linkis-new-microservice

[Module Name]
linkis-new-microservice

[VM Opitons]
-DserviceName=linkis-new-microservice -Xbootclasspath/a:{YourPathPrefix}/linkis/linkis-dist/package/conf

[main Class]
org.apache.linkis.newmicroservice.server.LinkisNewmicroserviceApplication

[Add provided scope to classpath]
By checking Include dependencies with “Provided” scope, you can introduce provided-level dependency packages during debugging.
After the above settings are completed, the Application can be run directly. After running successfully, open the browser and enter the url of the eureka registration center
http://ip:port/

When the linkis-new-microservice service appears in the eureka registration center, the local registration of the new microservice is successful.
1.5 Postman for interface debugging
URL: http://ip:port/api/rest_j/v1/newmicroservice/establish
2. Package deployment
Packaging and deployment mainly has two stages. The first step is that after the module is packaged by maven, the dependencies required by the module will be packaged into the corresponding target directory of the module linkis-new-microservice/target/out/lib. The second step is to assemble the complete final deployment installation package, you need to automatically copy
linkis-new-microservice/target/out/libtolinkis-dist/target/apache-linkis-x.x.x-incubating-bin/linkis - under package/lib
2.1 Modify the distribution.xml under the new service
path: linkis-public-enhancements/linkis-new-microservice/src/main/assembly/distribution.xml
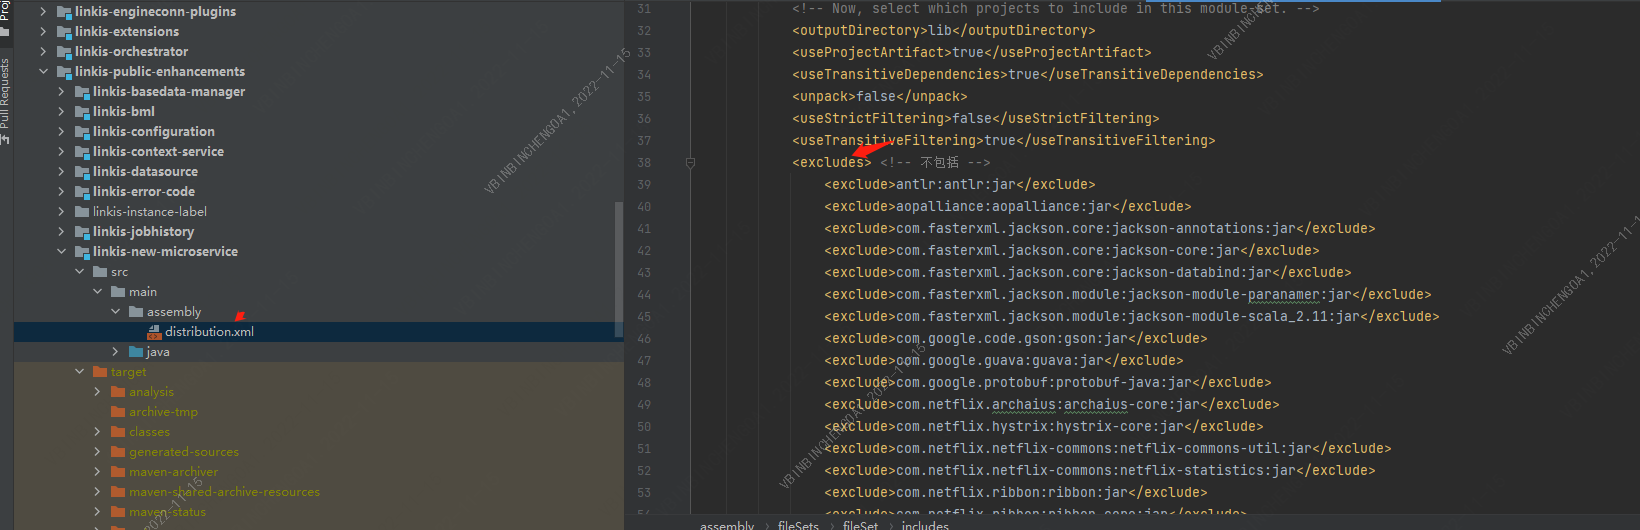
Since there are many dependencies that need to be excluded, only part of the code is posted here
  <excludes> <!-- does not include -->
           <exclude>antlr:antlr:jar</exclude>
           <exclude>aopalliance:aopalliance:jar</exclude>
           <exclude>com.fasterxml.jackson.core:jackson-annotations:jar</exclude>
           <exclude>com.fasterxml.jackson.core:jackson-core:jar</exclude>
 </excludes>
Here is an explanation of why you need to add
excludes, because the service startup script linkis-dist/package/sbin/ext/linkis-common-start generally loads the general lib by default
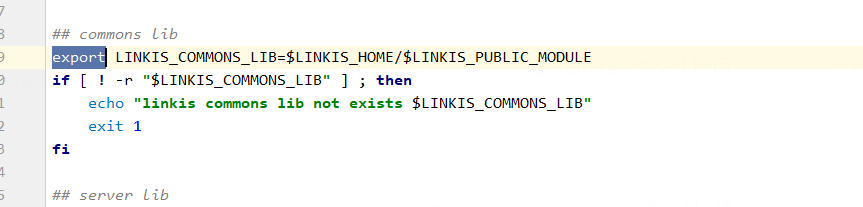
Therefore, when packaging service dependencies, existing lib packages can be excluded. For details, please refer to linkis-computation-governance/linkis-entrance/src/main/assembly/distribution.xml
2.2 Modify distribution.xml under linkis-dist
path: linkis-dist/src/main/assembly/distribution.xml
Add fileSet configuration, changing the configuration is mainly to control the output linkis-new-microservice service package when compiling and packaging
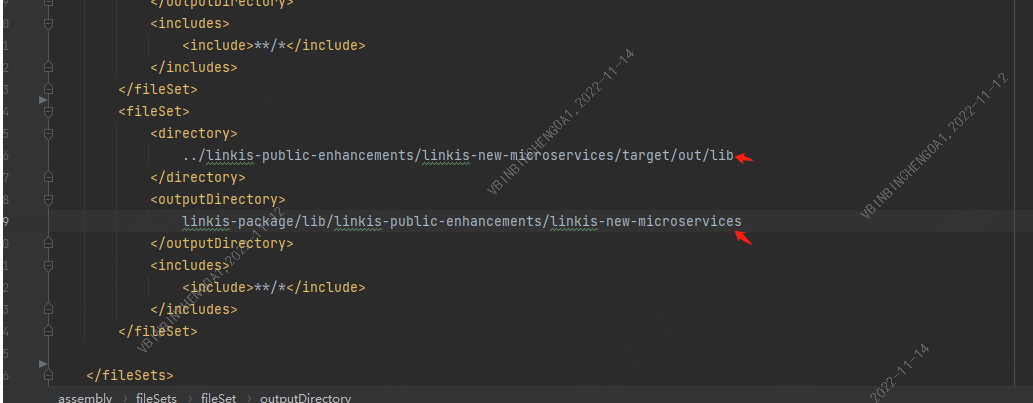
Only the configuration content that needs to be added is posted here.
   <fileSet>
            <directory>
                ../linkis-public-enhancements/linkis-new-microservice/target/out/lib
            </directory>
            <outputDirectory>
                linkis-package/lib/linkis-public-enhancements/linkis-new-microservice
            </outputDirectory>
            <includes>
                <include>**/*</include>
            </includes>
   </fileSet>
2.3 Run configuration script for the service
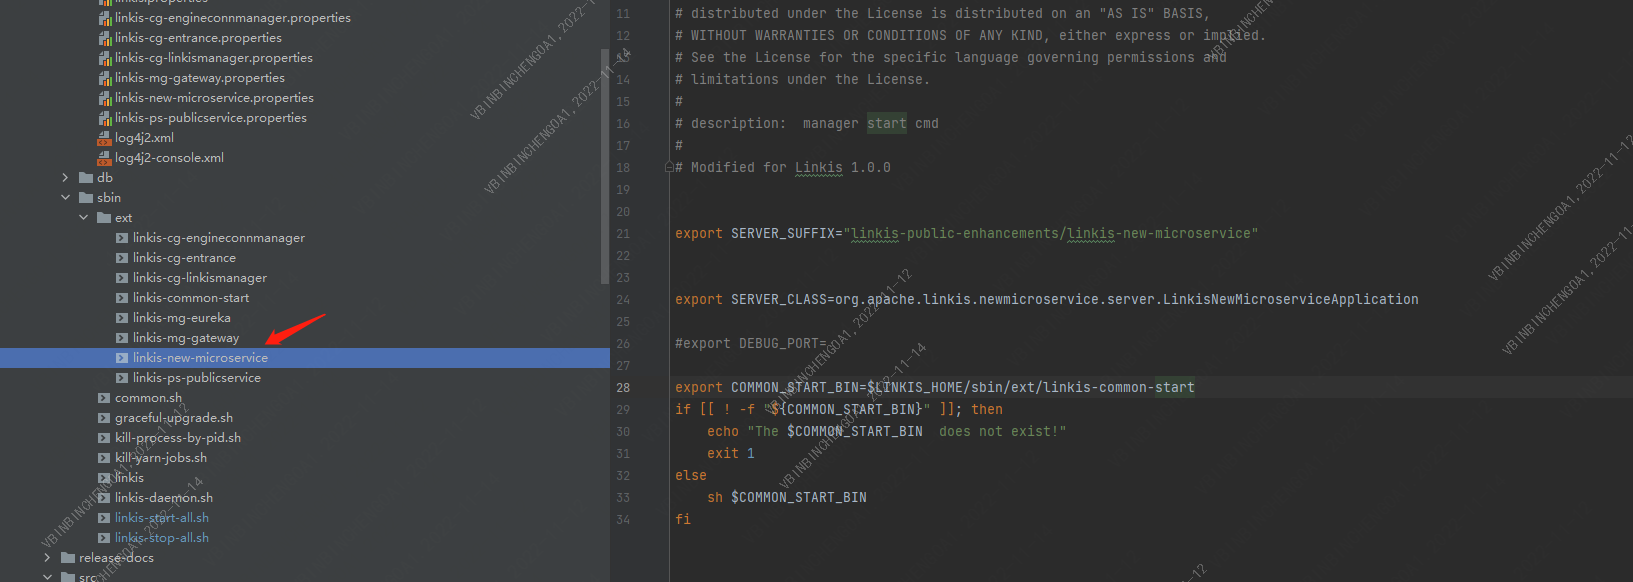
#!/usr/bin/env bash
#
# Licensed to the Apache Software Foundation (ASF) under one or more
# contributor license agreements.  See the NOTICE file distributed with
# this work for additional information regarding copyright ownership.
# The ASF licenses this file to You under the Apache License, Version 2.0
# (the "License"); you may not use this file except in compliance with
# the License.  You may obtain a copy of the License at
# http://www.apache.org/licenses/LICENSE-2.0
# Unless required by applicable law or agreed to in writing, software
# distributed under the License is distributed on an "AS IS" BASIS,
# WITHOUT WARRANTIES OR CONDITIONS OF ANY KIND, either express or implied.
# See the License for the specific language governing permissions and
# limitations under the License.
#
# description:  manager start cmd
#
# Modified for Linkis 1.0.0


export SERVER_SUFFIX="linkis-public-enhancements/linkis-new-microservice"


export SERVER_CLASS=org.apache.linkis.newmicroservice.server.LinkisNewMicroserviceApplication

#export DEBUG_PORT=

export COMMON_START_BIN=$LINKIS_HOME/sbin/ext/linkis-common-start
if [[ ! -f "${COMMON_START_BIN}" ]]; then
    echo "The $COMMON_START_BIN  does not exist!"
    exit 1
else
    sh $COMMON_START_BIN
fi
2.4 linkis-start-all.sh configuration modification
path: linkis-dist/package/sbin/linkis-start-all.sh
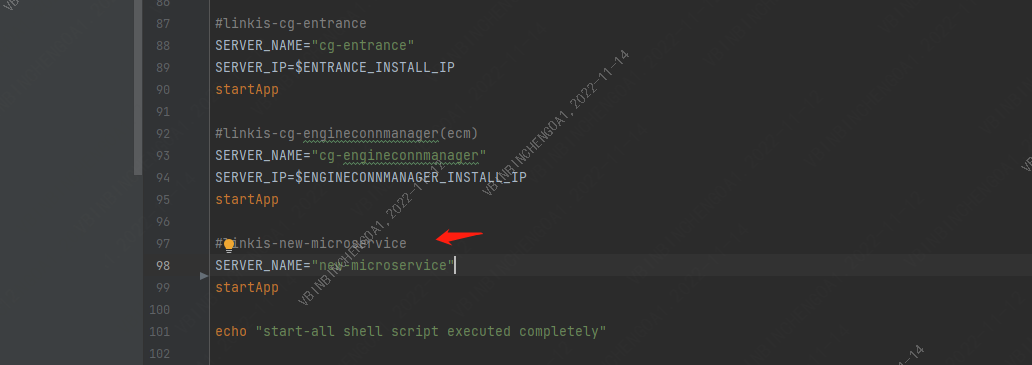
Only the configuration content that needs to be added is posted here.
    ## startApp
    #linkis-new-microservice
    SERVER_NAME="new-microservice"
    startApp
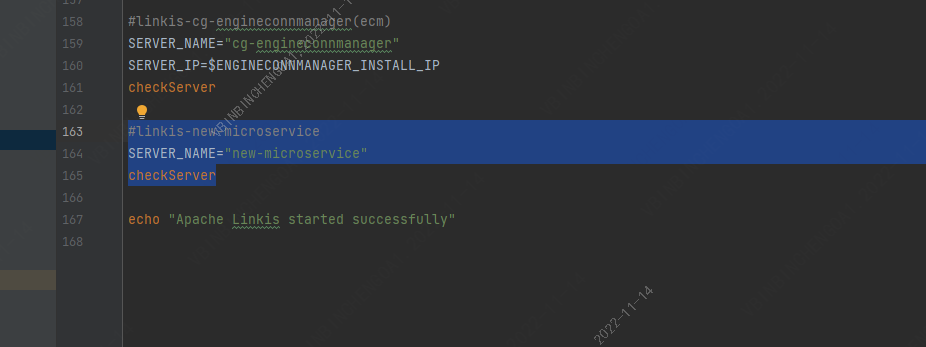
Only the configuration content that needs to be added is posted here.
    ##checkServer
    #linkis-new-microservice
    SERVER_NAME="new-microservice"
    checkServer
2.5 linkis-stop-all.sh configuration modification
path:linkis-dist/package/sbin/linkis-stop-all.sh
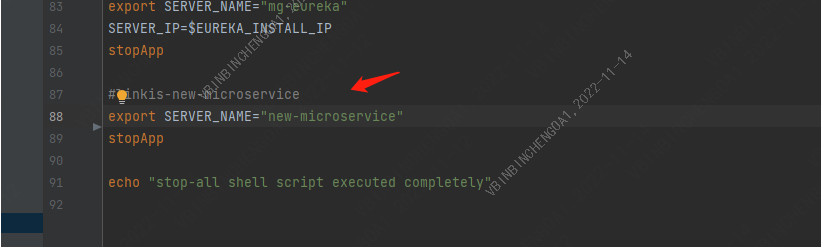
Only the configuration content that needs to be added is posted here.
    ## stopApp
    #linkis-new-microservice
    export SERVER_NAME="new-microservice"
    stopApp
2.6 Installation package preparation
The specific guidelines for this step have been written in the backend compilation document and can be directly accessed, so I won’t introduce too much here
2.7 Server Deployment
Here is an example of single-machine deployment, and the specific guidance of this step has been written in the Single-machine deployment document and can be accessed directly, so I won’t introduce it here
After the installation and deployment is successful, you can directly visit the eureka registration center in the browser to see if the center has successfully registered the linkis-new-microservice service. If the registration is successful, the creation of a new microservice is successful.