如何实现新的微服务
这篇文章介绍如何基于现有的Linkis微服务架构下,在本地开发调试一个新的微服务以及部署,方便有需要新增微服务的二次开发的同学参考。
思维导图:
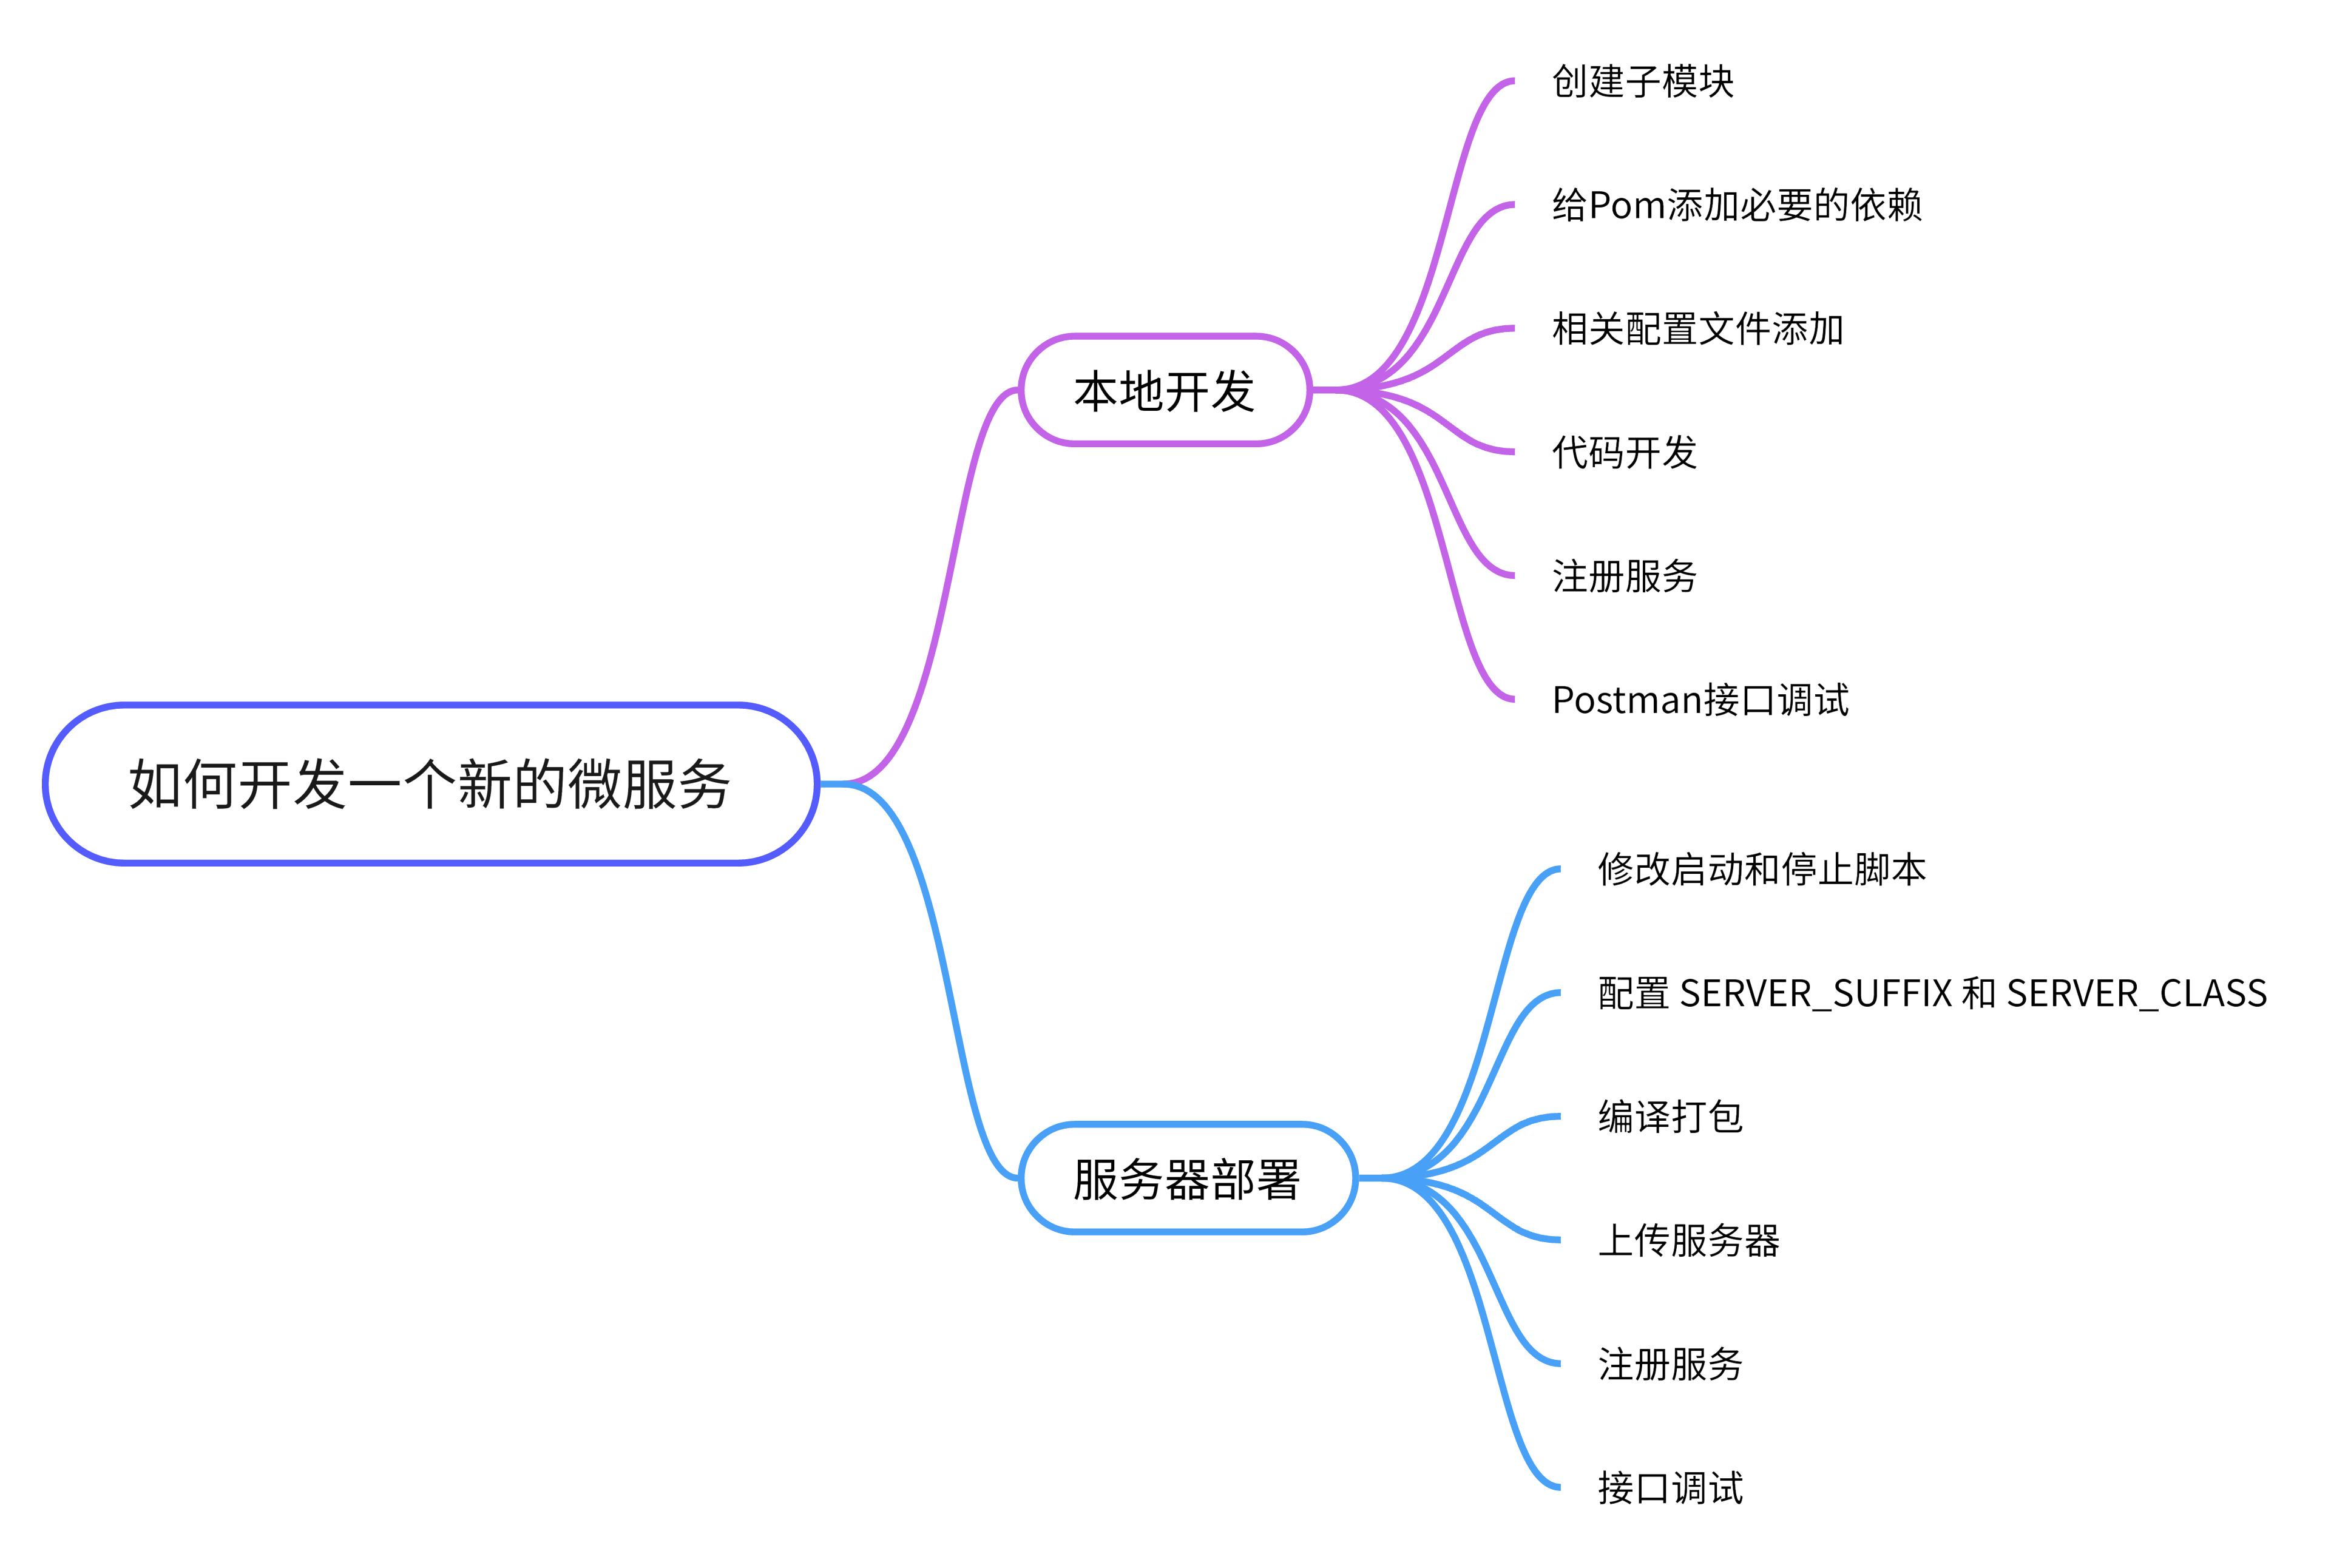
1. 新的微服务开发
本文以新增微服务
linkis-new-microservice为示例,进行介绍。 如何在IDEA中创建和注册一个属于linkis新的微服务
软件要求
- jdk1.8
- maven3.5+
1.1 新建子模块
注意:在什么模块下新建子模块,这个并不是固定的因情况而定,一般按服务组来划分确认,这里只是举例子。
- linkis-public-enhancements模块下 右键
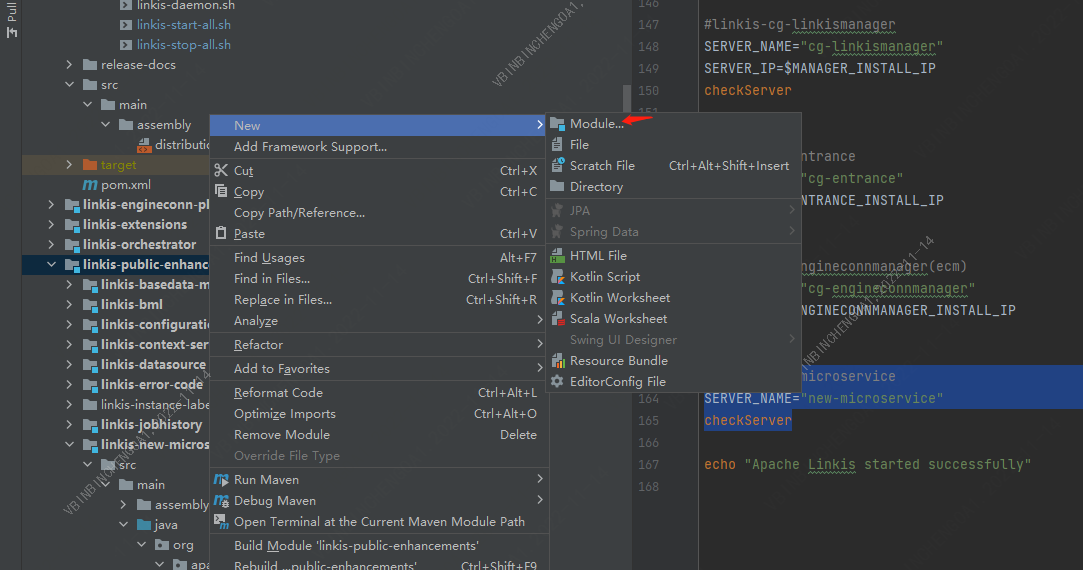
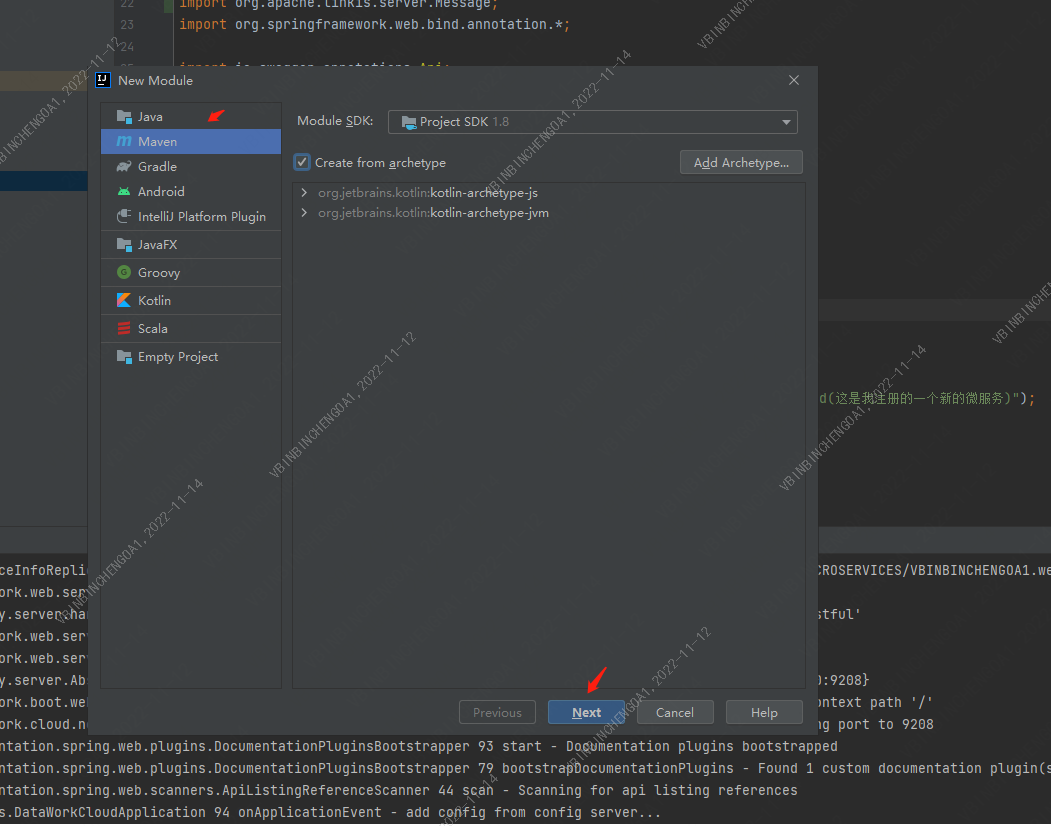
- 选择maven点击Nex下一步
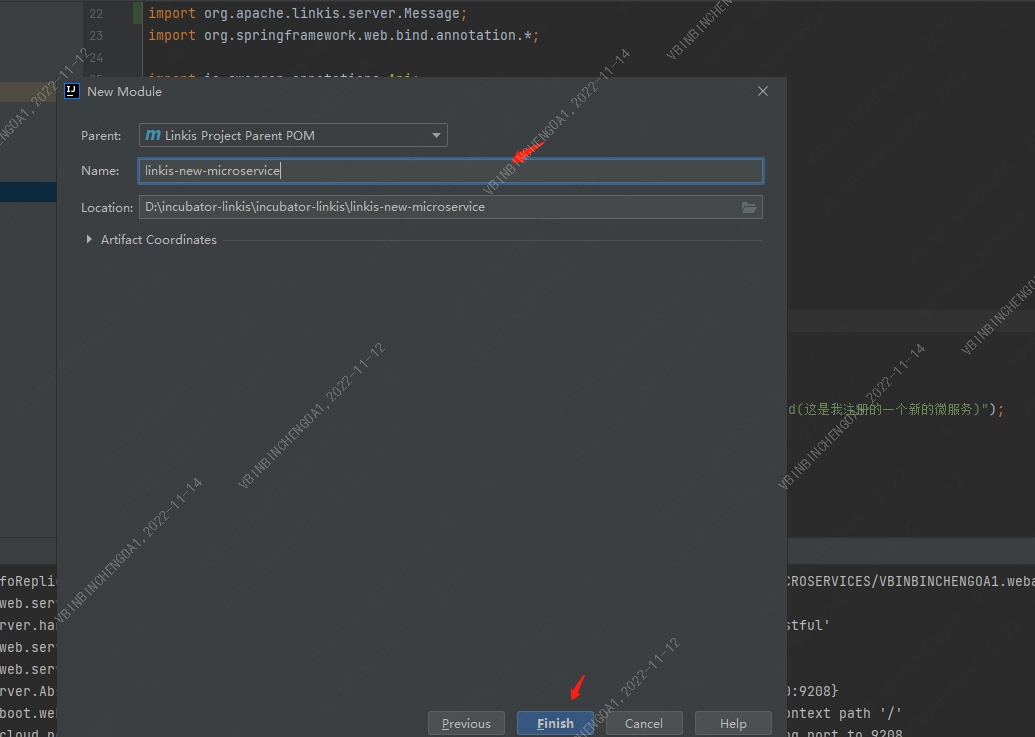
- 输入模块名点击Finsh
- 创建成功
1.1.1 修改linkis-new-microservice模块的pom.xml文件
path: linkis-public-enhancements/linkis-new-microservice/pom.xml
## 添加linkis的公共依赖模块和 mybatis模块依赖(如果不涉及数据库操作可以不添加mybatis)
  <dependency>
      <groupId>org.apache.linkis</groupId>
      <artifactId>linkis-module</artifactId>
      <version>${project.version}</version>
      <exclusions>
        <exclusion>
          <groupId>org.ow2.asm</groupId>
          <artifactId>asm</artifactId>
        </exclusion>
      </exclusions>
  </dependency>

  <dependency>
      <groupId>org.apache.linkis</groupId>
      <artifactId>linkis-mybatis</artifactId>
      <version>${project.version}</version>
  </dependency>
1.1.2 新增服务对应的配置文件
配置文件按 linkis-服务名.properties来命名,统一放在
linkis-dist/package/conf/目录下,服务启动时候会加载linkis.properties 通用配置文件以及linkis-服务名.properties配置文件
新增linkis-new-microservice.properties配置文件
path: linkis-dist/package/conf/linkis-new-microservice.properties
#
# Licensed to the Apache Software Foundation (ASF) under one or more
# contributor license agreements.  See the NOTICE file distributed with
# this work for additional information regarding copyright ownership.
# The ASF licenses this file to You under the Apache License, Version 2.0
# (the "License"); you may not use this file except in compliance with
# the License.  You may obtain a copy of the License at
# http://www.apache.org/licenses/LICENSE-2.0
# Unless required by applicable law or agreed to in writing, software
# distributed under the License is distributed on an "AS IS" BASIS,
# WITHOUT WARRANTIES OR CONDITIONS OF ANY KIND, either express or implied.
# See the License for the specific language governing permissions and
# limitations under the License.
#


## 如不需提供接口Api则无需添加此配置
##restful
wds.linkis.server.restful.scan.packages=org.apache.linkis.newmicroservice.server.restful

## mybatis 数据操作项目的配置
wds.linkis.server.mybatis.mapperLocations=classpath*:org/apache/linkis/newmicroservice/server/dao/mapper/*.xml
wds.linkis.server.mybatis.typeAliasesPackage=org.apache.linkis.newmicroservice.server.domain
wds.linkis.server.mybatis.BasePackage=org.apache.linkis.newmicroservice.server.dao


##切勿与其他服务的端口相同
spring.server.port=9208
1.1.4 开启调试模式
方便进行接口的调式,无需进行登陆态的验证
path: linkis-dist/package/conf/linkis.properties
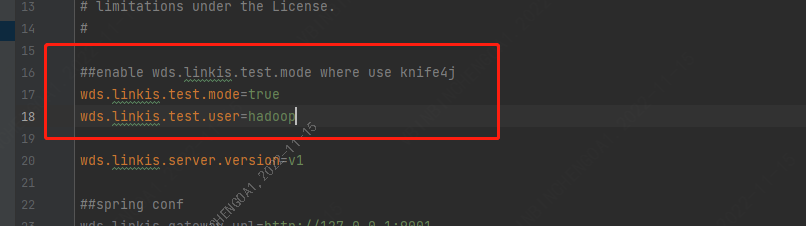
wds.linkis.test.mode=true   # 打开测试模式
wds.linkis.test.user=hadoop  # 指定测试模式下,所有请求都代理给哪个用户
1.2 代码开发
为方便大家学习,现以创建一个简单的API接口为示例。
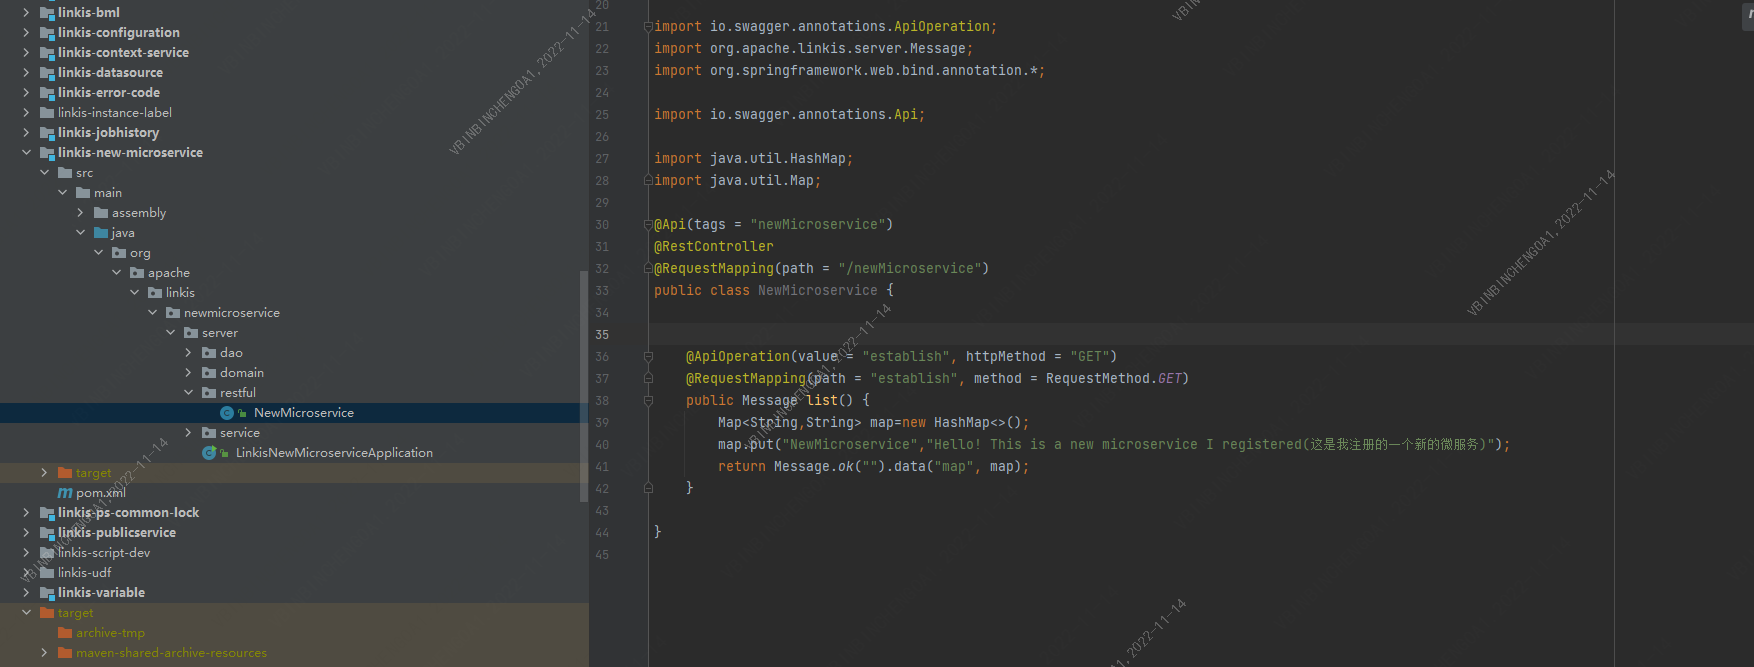
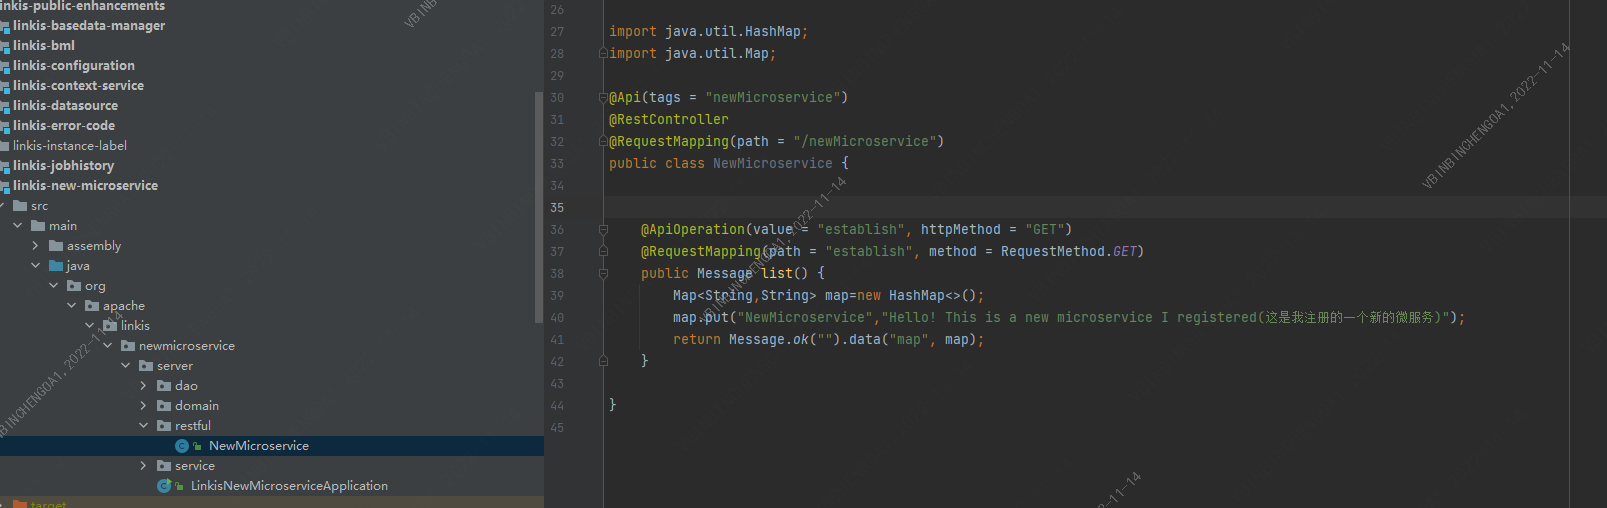
1.2.1 新建接口类
package org.apache.linkis.newmicroservice.server.restful;
import io.swagger.annotations.ApiOperation;
import org.apache.linkis.server.Message;
import org.springframework.web.bind.annotation.*;
import io.swagger.annotations.Api;
import java.util.HashMap;
import java.util.Map;
@Api(tags = "newmicroservice")
@RestController
@RequestMapping(path = "/newmicroservice")
public class NewMicroservice {
@ApiOperation(value = "establish", httpMethod = "GET")
@RequestMapping(path = "establish", method = RequestMethod.GET)
public Message list() {
Map<String,String> map=new HashMap<>();
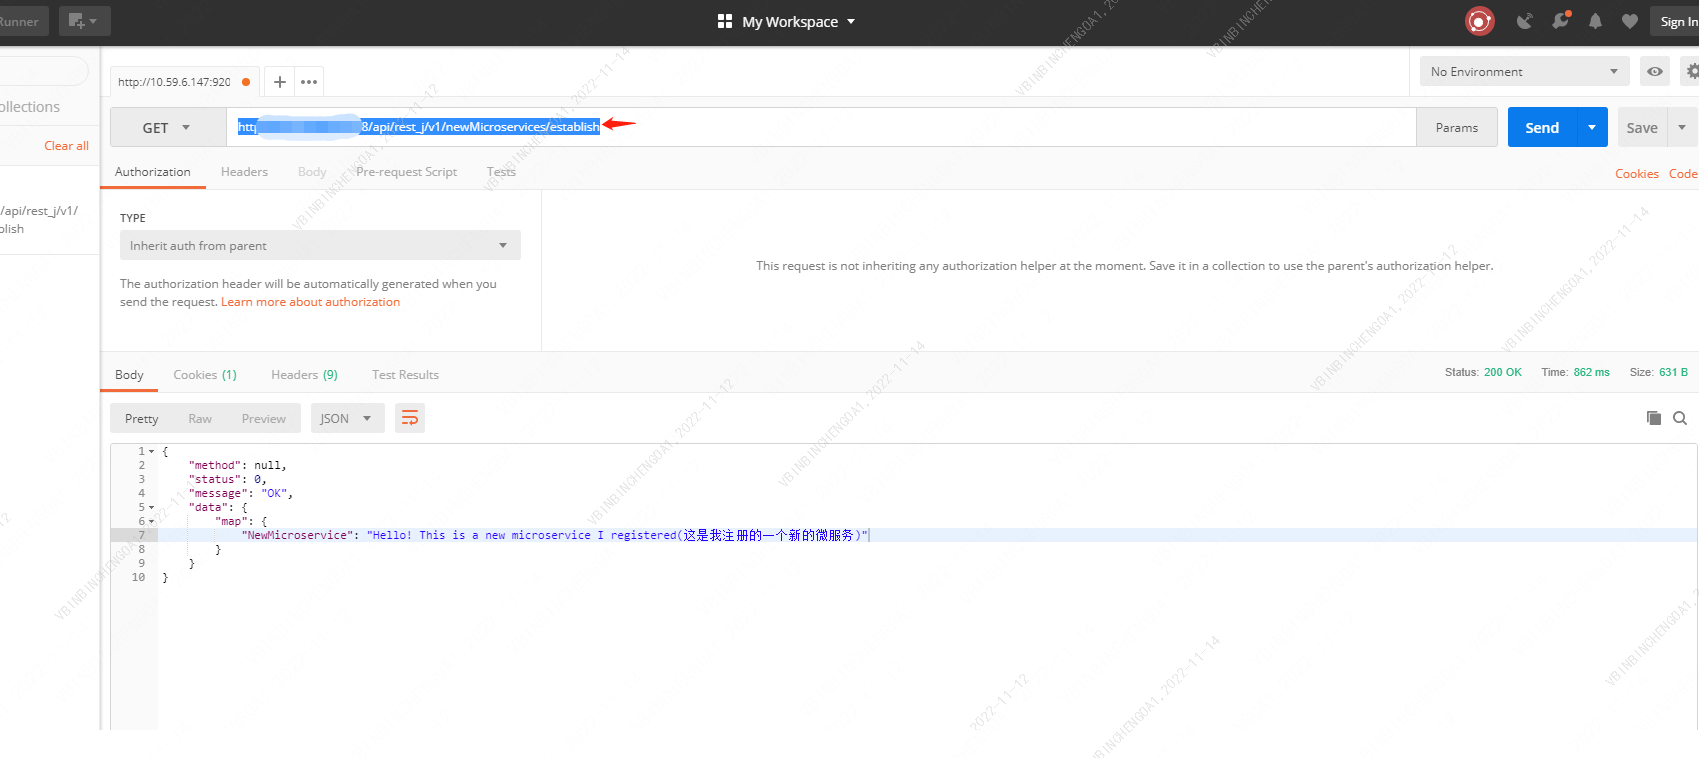
map.put("NewMicroservice","Hello! This is a new microservice I registered(这是我注册的一个新的微服务)");
return Message.ok("").data("map", map);
}
}
1.2.2 新建启动类
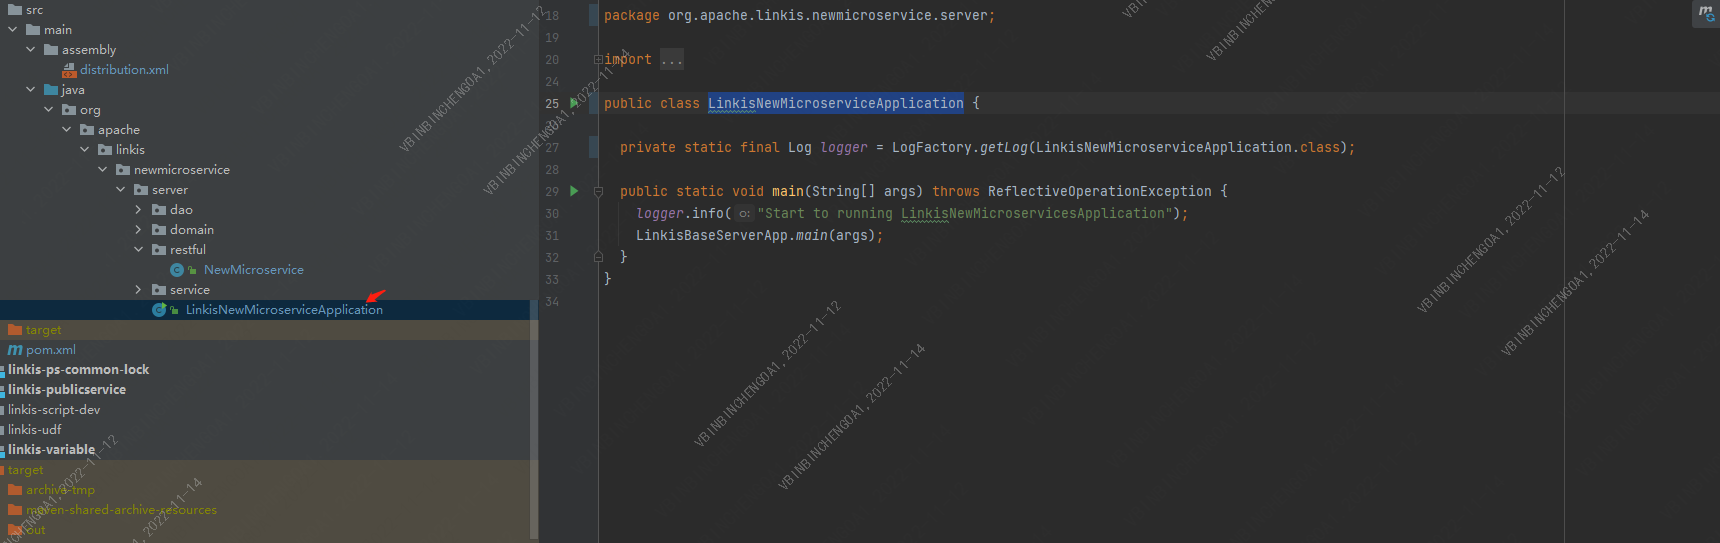
package org.apache.linkis.newmicroservice.server;

import org.apache.linkis.LinkisBaseServerApp;

import org.apache.commons.logging.Log;
import org.apache.commons.logging.LogFactory;

public class LinkisNewMicroserviceApplication {

  private static final Log logger = LogFactory.getLog(LinkisNewMicroserviceApplication.class);

  public static void main(String[] args) throws ReflectiveOperationException {
    logger.info("Start to running LinkisNewmicroserviceApplication");
    LinkisBaseServerApp.main(args);
  }
}
1.3 启动eureka服务
这一步骤的具体指引在 调试指引 文档中已有写 可直接访问,这里就不在过多介绍
1.4 本地启动新微服务
设置linkis-new-microservice的启动Application
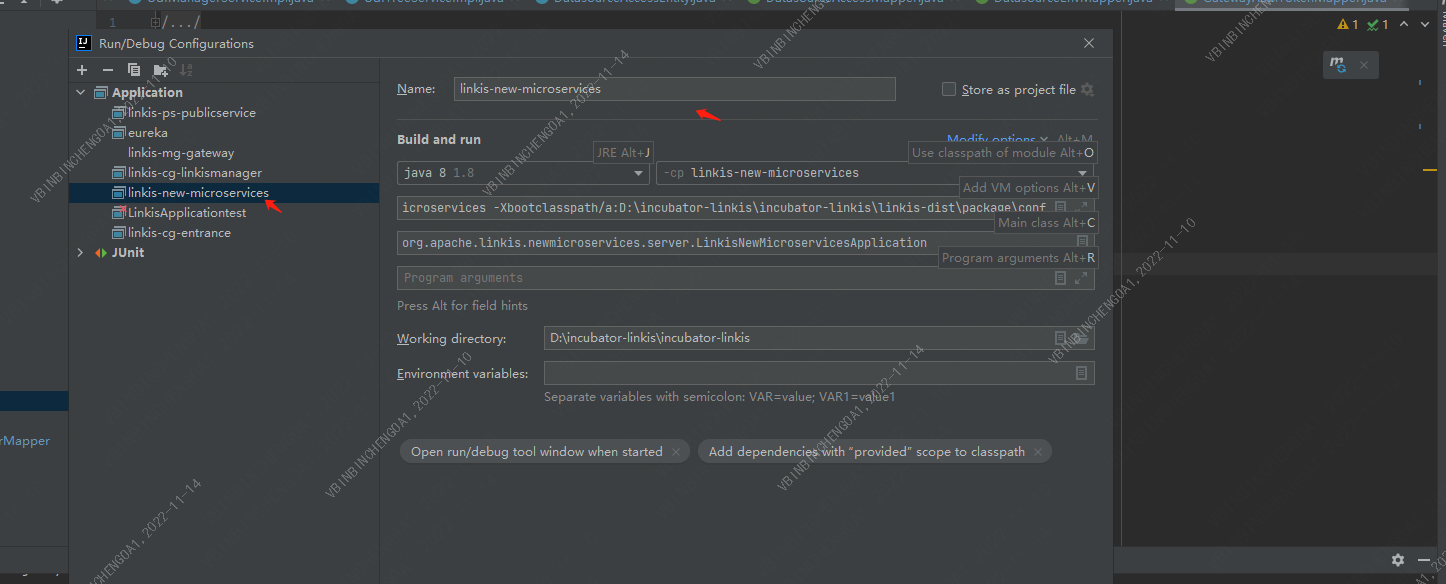
参数解释:
[Service Name]
linkis-new-microservice

[Module Name]
linkis-new-microservice

[VM Opitons]
-DserviceName=linkis-new-microservice -Xbootclasspath/a:{YourPathPrefix}/linkis/linkis-dist/package/conf

[main Class]
org.apache.linkis.newmicroservice.server.LinkisNewmicroserviceApplication

[Add provided scope to classpath]
通过勾选Include dependencies with “Provided” scope ,可以在调试时,引入provided级别的依赖包。
上述设置完成之后,可直接运行此Application。运行成功后打开浏览器输入eureka注册中心的url
http://ip:port/

当eureka注册中心出现linkis-new-microservice服务即为本地注册新的微服务成功。
1.5 Postman 进行接口调试
URL: http://ip:port/api/rest_j/v1/newmicroservice/establish
2. 打包部署
打包部署主要有有两个阶段 第一步是模块通过maven打包后 会将模块所需要的依赖 打包到模块对应的target目录下 linkis-new-microservice/target/out/lib。 第二步是 组装完整的最终部署安装包时,需要将
linkis-new-microservice/target/out/lib自动拷贝至linkis-dist/target/apache-linkis-x.x.x-bin/linkis-package/lib下
2.1 修改新服务下的distribution.xml
path: linkis-public-enhancements/linkis-new-microservice/src/main/assembly/distribution.xml
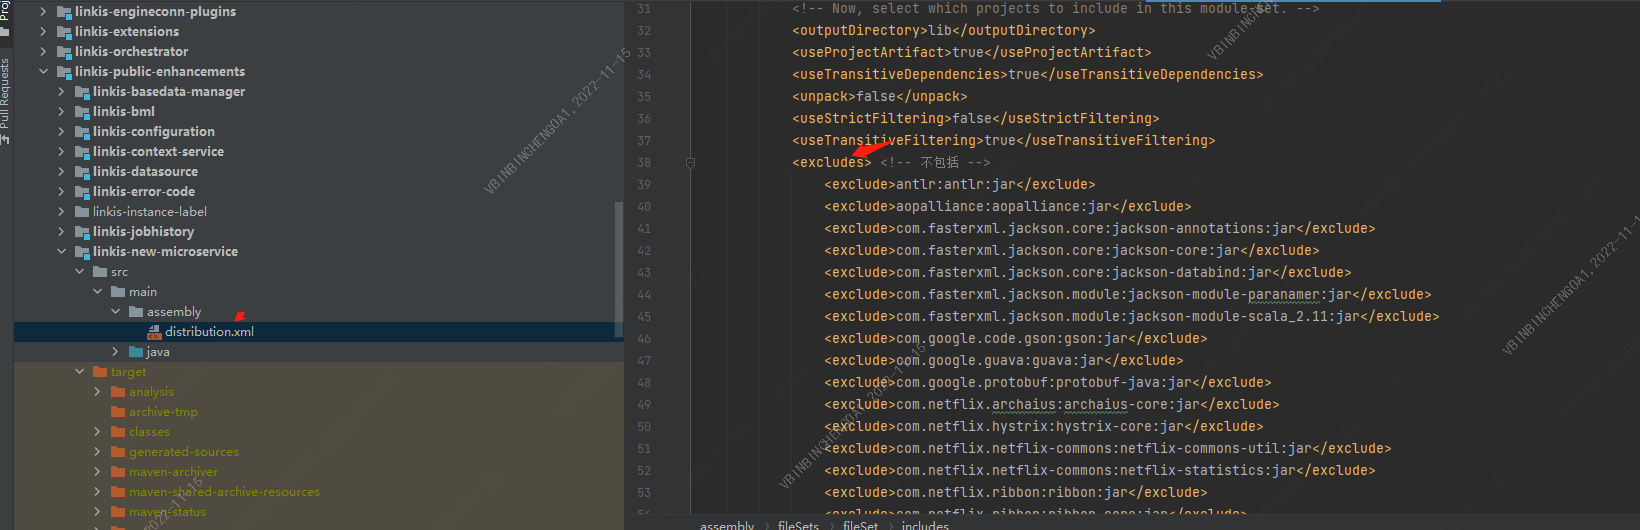
由于需要排除的依赖比较多这里只贴部分代码
  <excludes> <!-- 不包括 -->
           <exclude>antlr:antlr:jar</exclude>
           <exclude>aopalliance:aopalliance:jar</exclude>
           <exclude>com.fasterxml.jackson.core:jackson-annotations:jar</exclude>
           <exclude>com.fasterxml.jackson.core:jackson-core:jar</exclude>
 </excludes>
这里解释下为什么需要加
excludes,因为服务启动脚本 linkis-dist/package/sbin/ext/linkis-common-start 中一般会默认加载通用的lib
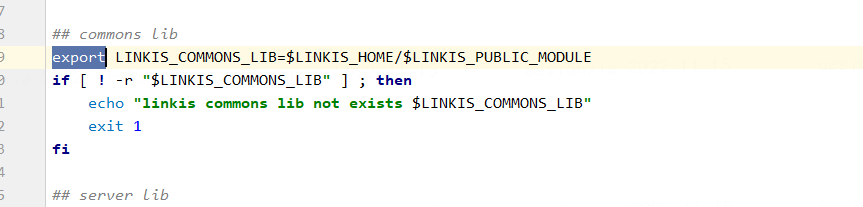
所以在打包服务依赖时候,可以排除已有的lib包.详细可以参考linkis-computation-governance/linkis-entrance/src/main/assembly/distribution.xml
2.2 修改linkis-dist下的distribution.xml
path: linkis-dist/src/main/assembly/distribution.xml
添加fileSet 配置,改配置主要是控制编译打包时的能输出linkis-new-microservice服务包
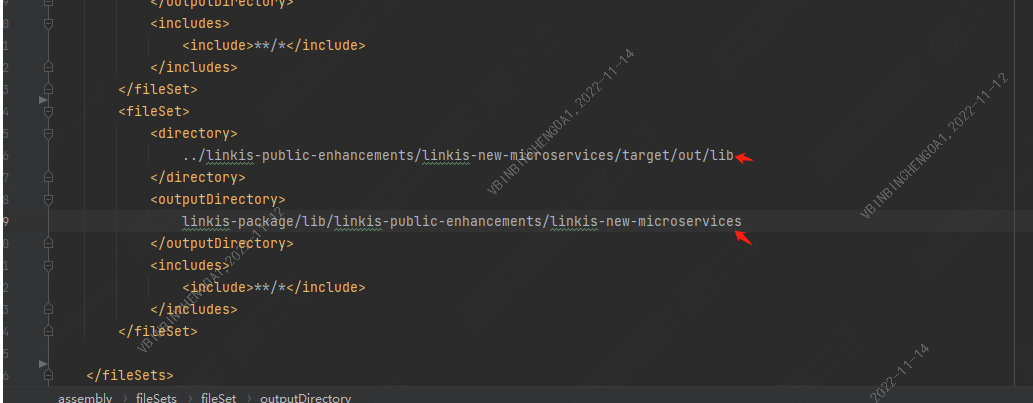
这里只贴出来需要新增的配置内容。
   <fileSet>
            <directory>
                ../linkis-public-enhancements/linkis-new-microservice/target/out/lib
            </directory>
            <outputDirectory>
                linkis-package/lib/linkis-public-enhancements/linkis-new-microservice
            </outputDirectory>
            <includes>
                <include>**/*</include>
            </includes>
   </fileSet>
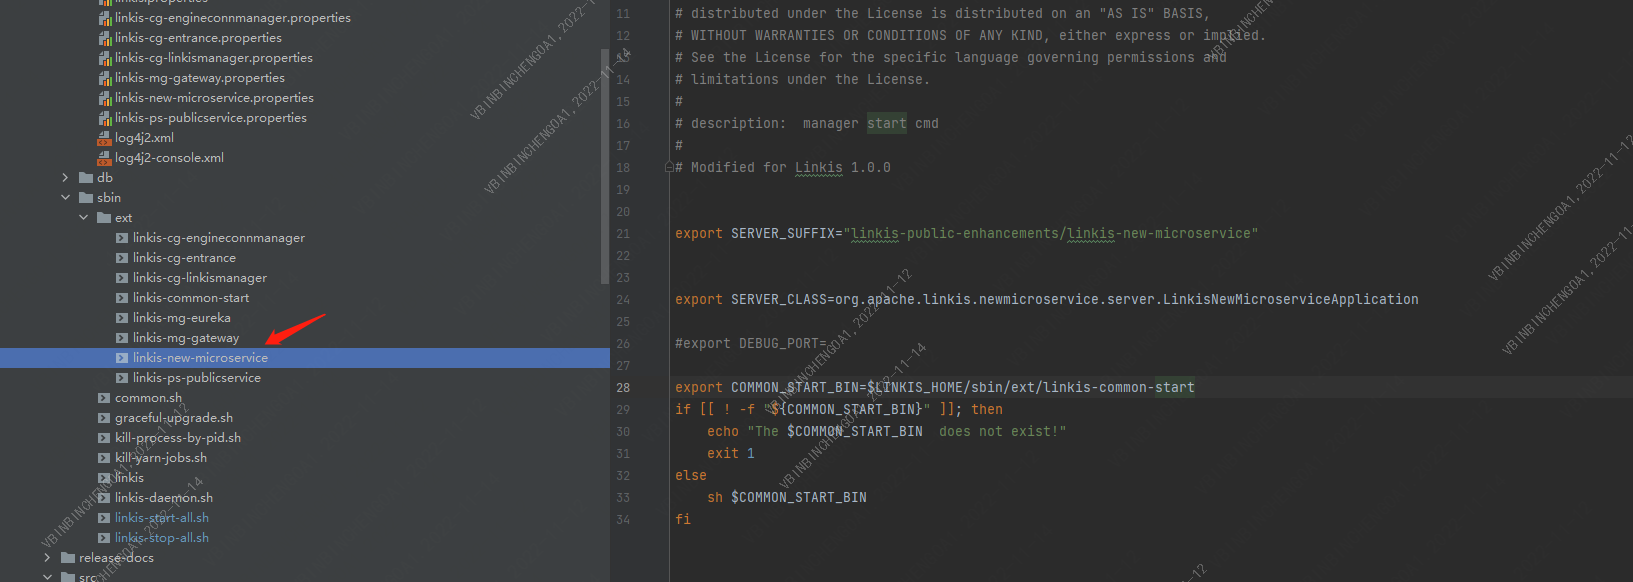
2.3 服务的运行配置脚本
#!/usr/bin/env bash
#
# Licensed to the Apache Software Foundation (ASF) under one or more
# contributor license agreements.  See the NOTICE file distributed with
# this work for additional information regarding copyright ownership.
# The ASF licenses this file to You under the Apache License, Version 2.0
# (the "License"); you may not use this file except in compliance with
# the License.  You may obtain a copy of the License at
# http://www.apache.org/licenses/LICENSE-2.0
# Unless required by applicable law or agreed to in writing, software
# distributed under the License is distributed on an "AS IS" BASIS,
# WITHOUT WARRANTIES OR CONDITIONS OF ANY KIND, either express or implied.
# See the License for the specific language governing permissions and
# limitations under the License.
#
# description:  manager start cmd
#
# Modified for Linkis 1.0.0


export SERVER_SUFFIX="linkis-public-enhancements/linkis-new-microservice"


export SERVER_CLASS=org.apache.linkis.newmicroservice.server.LinkisNewMicroserviceApplication

#export DEBUG_PORT=

export COMMON_START_BIN=$LINKIS_HOME/sbin/ext/linkis-common-start
if [[ ! -f "${COMMON_START_BIN}" ]]; then
    echo "The $COMMON_START_BIN  does not exist!"
    exit 1
else
    sh $COMMON_START_BIN
fi
2.4 linkis-start-all.sh 配置修改
path: linkis-dist/package/sbin/linkis-start-all.sh
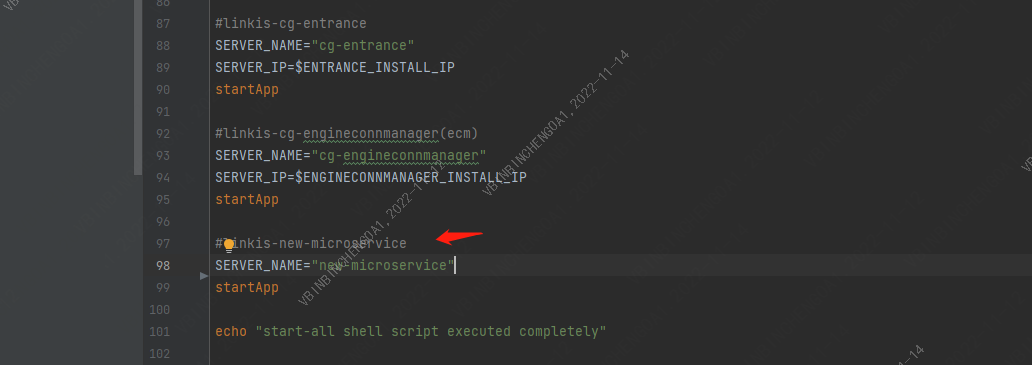
这里只贴出来需要新增的配置内容。
    ## 启动脚本
    #linkis-new-microservice
    SERVER_NAME="new-microservice"
    startApp
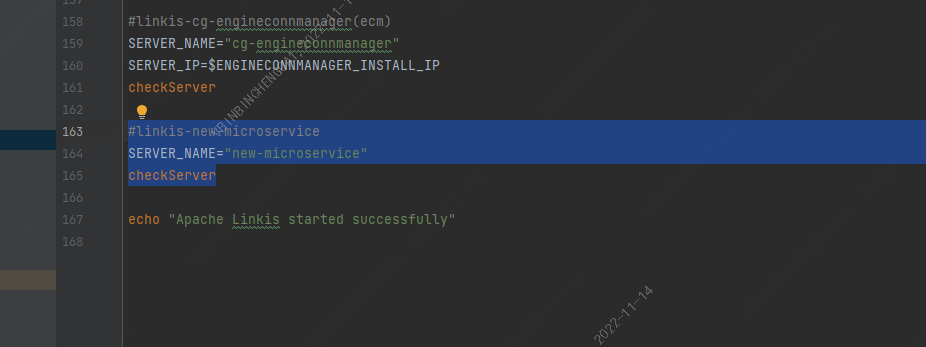
这里只贴出来需要新增的配置内容。
    ##检测脚本
    #linkis-new-microservice
    SERVER_NAME="new-microservice"
    checkServer
2.5 linkis-stop-all.sh 配置修改
path:linkis-dist/package/sbin/linkis-stop-all.sh
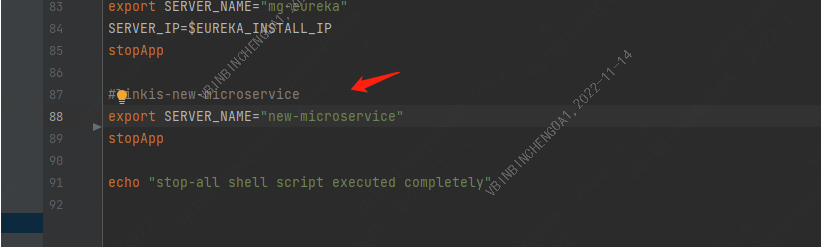
这里只贴出来需要新增的配置内容。
    ## 停止脚本
    #linkis-new-microservice
    export SERVER_NAME="new-microservice"
    stopApp
2.6 安装包准备
这一步骤的具体指引在 后端编译 文档中已有写 可直接访问,这里就不在过多介绍
2.7 服务器部署
这里为单机部署做示例,而该步骤的具体指引在 单机部署 文档中已有写 可直接访问,这里就不在过多介绍 当安装部署成功后可直接在浏览器中访问eureka注册中心,看中心是否已经成功注册linkis-new-microservice服务,如注册成功即为创建新的微服务成功。